LabVIEW Development Best Practices Blog

Community Browser
cancel
Showing results for 
Search instead for 
Did you mean: 
Elijah_K
13792 Views
0 Comments

LabVIEW development spans the gamut of small measurement applications, globally-deployed test systems, mission-critical embedded applications, and everything in-between.  However, most everyone in any of these fields can relate to the increased complexity of modern applications, which is compounded with a growing pressure to get to market as quickly as possible and hit impossible deadlines.  For this reason, it should come as no surprise that I spend so much of my time on this blog talking about software engineering tools that can automate repetitive, tedious tasks, such as software testing and validation against requirements.  I want to emphasize that these tools are only made useful when combined with planning and discipline, but when used by the right people, these tools can help get you to market sooner and with much higher quality software.

This brings me to a new software engineering tool for fellow wire-workers: The LabVIEW Plugin for Ranorex, which is designed to automate user interface testing.  This product was developed by one of our alliance partners, NTESystems, who set out to create a tool that would automate the otherwise tedious task of running through operator test scripts.  By leveraging a pre-existing UI testing framework from Ranorex, NTE Systems was able to ensure that the tool was both easy to use and affordable.

If you aren't familiar with automated UI testing, the fundamental concept is the same for any and all software development environments.  You need to record the possible interactions with items that a user would expect to control, press, or see, and make sure that the application does exactly what it's supposed to.  As an example, one of the fundamental tests for any piece of software is: does it stop when it's supposed to?  This is easy enough to test on your own, but keep in mind that you need to make sure that it continues to stop appropriately as we add or change features throughout development (by the way, if you don't do this now.. you should do it from day one).  Of course, user interfaces quickly become more complicated than just a stop button - they often have menus, graphs, charts, sliding panels, etc... For this reason, manually performing all of these tests on a regular basis can become very time and cost prohibative.  As always, this is where automation can save time and money.

The plugin for Ranorex from NTE offers the unique advantage of tracking the location, size and other properties of front panel controls.  Because of this, test scripts do not have to be modified when a button is moved or resized. The plugin is also able to verify that front panel objects have the correct output as well as properties (size, color, etc..).

For more information, visit the links below:

You can see examples of this whole process of doing capture/replay here:

Moreover you can see a detailed description of how our tool works here:

Download or evaluate the plugin here:

If you have any questions, I would encourage you to email them directly at support.asflv@ntesystems.at.  They're also more than happy to give web demos and answer any of your questions.

Elijah_K
12317 Views
1 Comment

Once again, it's the most wonderful time of the year!  NI Week is just a few weeks away, and we're gearing up for what promises to be one of the biggest and best conferences yet.  So get your plane tickets, register for the conference, book your hotel room, and prepare for the Austin heat and the freezing cold of the conference center.

While it's true that I'll jump at any chance to shamelessly plug NI Week, it's also true that we have an impressive lineup of technical sessions this year.  I wanted to take a moment to highlight a few in particular that are especially relevant for wire-workers that want to improve their development practices or learn more about software engineering practices for small, medium or large applications.  Keep in mind that these are just some of the over 300 technical sessions we're having this year.

Improving Development Practices and Introduction to Tools

Best Practices for Software Development in LabVIEW

Tuesday, August 3 2:15–3:15 p.m. Room 12B

Elijah Kerry (CLA), LabVIEW Product Manager, National Instruments

Team-Based Development and Source Code Control:

Tuesday , August 3 3:45-5:45 p.m. Room 12A

Elijah Kerry (CLA), LabVIEW Product Manager, National Instruments

Development and Deployment of Large LabVIEW Applications

Wednesday, August 4 2:15–3:15 p.m. Room 12A

Miko Hadikusuma, Senior Software Engineer – LabVIEW R&D, National Instruments

NI Requirements Gateway – A Power User’s Session

Wednesday, August 4 3:30–4:30 p.m. Room 17B

Christopher Relf (CLA, CTA), Principal Architect, VI Engineering

Software Architecture and Advanced Technical Sessions

LabVIEW Classes – The State of the Art

Thursday, August 5 10:30–11:30 a.m. Room 12A

Stephen Mercer (CLA), Senior Software Engineer – LabVIEW R&D, National Instruments

LabVIEW OOP Design Patterns for Large Systems

Thursday, August 5 1:00–2:00 p.m. Room 12A

James Kring (CLA), CEO, JKI

LabVIEW Dynamic Design Patterns

Wednesday, August 4 10:30–11:30 a.m. Room 16B

Norm Kirchner (CLA, CTA), Senior Systems Engineer, National Instruments

LabVIEW GUI Design 2.0

Wednesday, August 4 4:45–5:45 p.m. Room 12B

Jonathan Cohn (CLA, CPI), Engineer, Bloomy Controls

Beyond the Basics: LabVIEW Debugging Techniques

Thursday, August 5 2:15–3:15 p.m. Room 12A

Tycho Castberg, Senior Software Engineer – LabVIEW R&D, National Instruments

For all the details on this year's conference, visit ni.com/niweek.  See you there!

Elijah_K
13913 Views
4 Comments

The first rule I advocate for deploying LabVIEW code is do it early and often.  If you wait until the project is almost done before building an executable for the first time, you're probably in for some surprises.  This applies to any development environment, including LabVIEW.  In order to build your application early and often, many software engineers automate the build process and combine it with other automated tasks, such as static code analysis.

I've had several people ask me how to do this recently, so I wanted to take a moment to highlight some resources and examples from the wire-working community that could help you get started.

So if you're interested in automating this very important task, I recommend starting with these resources.  As always, please comment if you know of additional tools or have questions on the topic.

Cheers from San Fransisco,

Eli

Elijah_K
17693 Views
2 Comments

Developing complex applications not only requires skilled programmers, it requires programmers who are familiar with the process and the tools they're expected to use. I'm a advocate that anyone working on a large application should at least be a CLD (Certified LabVIEW Developer), but I strongly recommend that they pursue becoming a CLA (Certified LabVIEW Architect).  Unlike the CLD, which is a measure of someone's ability to write good code, the CLA assesses an individual's ability to design and, of course, architect an application.

This page defines the differences in the three levels of LabVIEW certification - note that certifications are available for a number of other NI products, including TestStand.

Both the CLA and the CLD are four hour exams.  At the end of the CLD, you'll only need to submit a working and complete application that's well documented and reflects good coding practices.  The CLA is divided been coding and short answer essay questions, which requires much more discipline when it comes to time management.  One of the most notable and importance differences between the two exams is that the application you submit in the CLA is not required to be a working or complete piece of software.  In fact, if you try to finish the application you'll almost certainly run out of time to answer the essay questions.

Also, try not to spill coffee all over yourself and the exam half-way through.... like me. 

The code that you submit for the CLA should be a framework that clearly indicates what the sub-components are and shows your fundamental design choices, like how modules will communicate with each other, how application timing is enforced, and how errors are handled.  Throughout the exam, I recommend a focus on providing just enough information for someone else to fill in the pieces, without spending too much time developing the pieces yourself (I kept having to remind myself throughout the exam, as I enjoy developing code and can easily get swept up in it).  Of course, the code that you do write will still need to enforce code style guidelines and practices.

As for the short answer essays, I had many people recommend that I allot certain times to each section, but I instead chose to work on both at the same time. The essay questions ask about design choices and development practices you made and, in some cases, for justifications as to why, but they all apply to the code you're writing.  I recommend reading the description of the application first, then skimming over the short answer questions so that you can be thinking about the answers as you develop your application framework. When all was said and done, I estimate that I spent just under half of my time on the essay questions, and the rest was alloted for coding.

In addition to justification of design choices, the short answer questions also cover a broad range of software engineering topics, many of which are covered in the Managing Software Engineering with LabVIEW and Advanced Application Architectures training classes.  To brush up on these practices, or if you haven't taken the class, you can also review the material on ni.com/largeapps.  Some of the fundamental questions will likely include topics such as team-based development and strategies for reuse.  The full list of topics is available from the CLA Preparation Guide.

In addition to the resources provided by NI, which are available here, Darren has a popular blog entry on the topic that I found to be very helpful, read it here: LabVIEW Artisan.

One final note: If you get the certification and join the ranks of CLAs around the world, not only do you get a free t-shirt and the esteem of the title, we'll also look forward to seeing you at next year's LabVIEW Architect Summit here in sunny Austin, Texas!

Elijah_K
76422 Views
86 Comments

As anyone who has asked me about source code control knows, I've become a very big fan of Subversion; specifically, TortoiseSVN.  I originally started using it because a large number of NI customers I was speaking with had made the switch, due in no small part to the price tag (it's free).  But it's not just the price that makes it so appealing - TortoiseSVN is very easy and simple to use, which makes it something that makes you more efficient, rather than weigh your development process down.

If you're not using source code control at all, you're playing with fire.  And since Subversion is free, you now have no excuse.  Still not convinced?  Has any of the following ever happened to you:

  • You delete or change some code as part of an experiment or perhaps debugging, and then save it.  If you want to undo these changes, you have to redo it yourself.
  • You want to experiment with a new implementation or function, so you save the old VI or project to 'My Project OLD,' to make sure you have your backup handy. (Now you have a bunch of other copies of your application all over your laptop and your network drive).
  • You want someone else to look at your code or even modify it. (again, you put a copy on the network folder or a jump drive... but when you make a change, you have to go do it all again!)
  • You open an older copy of your application or a copy saved in a different location, causing a link conflict (lets face it, fixing this is not fun)
  • You introduced a bug into your code a few days ago and want to revert to an older version to figure out what changed (too bad)
  • An angered or jealous C developer steals your laptop and destroys it, taking with it the only copy of your code. (that's what you get for under-bidding him by 3X)

Any of these could've been avoided or made easier if you'd been using source code control.   So go download Subversion!  Go here.

UPDATE (7/29/13)

There is now a free plugin from Viewpoint Systems that sets up integration with Tortoise for you (including diff and merge) and overlays the icons in the Project Explorer - the best part is that it's totally FREE.  I strongly recommend that anyone using SVN+LabVIEW install this tool.  The latest version can be found here: Subversion Version Control for LabVIEW. Please make sure you already have Tortioise installed - if you don't, make sure to restart your computer after installing Tortoise.  You'll also need to restart LabVIEW after installing this plugin.  Enjoy!

Tip 1

If you're going to use Subversion with LabVIEW, you need to know a few things.  Subversion stores some hidden folders and files in your directory structure, which can cause some problems when mass compiling or using auto-populating folders.  Not to worry!  Open your labview.ini file and enter 'skipSVNFolders=true' to resolve this issue (only works in 2009, will be on by default in 2010).

Tip 2

If you're using the professional version of LabVIEW, you can tell Subversion (or any source code control tool) to invoke the command-line diff and merge executables.  To set this up, right click in Windows Explorer and select TortoiseSVN > Settings.  Select Advanced and enter the following for a .vi file type (this can also be used for a .ctl)  "C:\Program Files\National Instruments\Shared\LabVIEW Compare\LVCompare.exe" %mine %base -nobdcosm -nobdpos.  Do the same for merge, but enter "C:\Program Files\National Instruments\Shared\LabVIEW Merge\LVMerge.exe" %base %mine %theirs %merged.  The command line parameters are explained in the LabVIEW help, click here for LVCompare.exeMore info on command-line differencing.

Getting Started with Subversion

If you've never used source code control and want to give it a try, check out this hands-on exercise and example program I published here: http://decibel.ni.com/content/docs/DOC-10122

As for experienced source code control readers and users, what packages are you using, and do you have any tips for use with LabVIEW?  Is anyone using Git or Mercurial? (two other popular open source SCC providers)

Elijah_K
21369 Views
6 Comments

UPDATE (8/22/12): This product is no longer available for purchase.

LabVIEW makes it easy to design and build graphical user interfaces (GUIs), but it's important that we be able to test these interfaces in a repeatable and automated fashion throughout the development life-cycle.  Even simple applications with only a few buttons or menus can take a considerable amount of time to test and validate if they require simulating the interaction of a user.

One of our partners, NTE Systems, has created a LabVIEW plug-in for the popular user-interface testing tool, Ranorex.  By leveraging a popular and well-established framework for recording and testing UI interactions, they have made it possible to automate the testing of your LabVIEW GUIs.

The Ranorex tool-chain includes a recording utility that lets you capture mouse clicks and key-presses, select the items you want to validate (ie: does the indicator show the right value?, does the graph have the correct properties?), and easily play back the recording.  Thanks to the work from NTE, the tool can intelligently track objects if they get changed or moved during development, which saves you the trouble of continuously re-creating existing tests.  Amongst other features, Ranorex also provides the ability to speed playback up to 9x times the actual speed and generate extensive reports and documentation.  The sequence and order of steps can also be customized and automated.  For more information on the capabilities of the tool, visit ranorex.com.

Interested in using the tool with LabVIEW?

Currently, the plug-in is in BETA, but you can sign up to download and evaluate the pre-released version of the tool for free.  If you're interested, please email NTE directly at support.asflv@ntesystems.at

Ranorex Image.jpg


Elijah_K
20143 Views
10 Comments

When working with customers who are struggling to improve the quality of their code, it almost always comes to light that they've been failing to conduct code reviews on a regular basis, if at all. Code reviews are an important and often overlooked step towards meeting the needs of medium to large development teams working on complex applications.  This fairly simple step in the development process can help improve readability, maintainability and scalability of software, as well as help detect defects and problems much earlier in the software life-cycle.


So how do you conduct a code review?  Well, the answer can differ widely based upon internal practices and the nature of the code that is being reviewed, but the fundamental idea is that you should have more than one pair of eyes look at your code before submitting a change or adding new functionality.  That sounds simple enough, but I'll do my best to highlight some common practices that can help make your code reviews more effective and productive.


1. Use SCM Tools to Track Changes

Effective code reviews are typically coupled with the use of some form of software configuration management (SCM) to identify and track changes to the source code and track the status of the project. Source code control tools such as a Subversion, Perforce and ClearCase (just to name a few) make it possible to store previous revisions and perform side-by-side comparisons to identify exactly what has been modified.  In addition to preserving and protecting prior revisions, this makes it easy to isolate reviews to the new sections of code.  When new bugs are detected (possibly during regression testing), it also makes it easy to compare with the last known working version to see what changes may have introduced a behavioral change.  For information on how to use the graphical differencing feature in LabVIEW to help track changes, click here.


2. Perform Reviews Often

Most structured development environments have well-defined milestones and different phases of the project prior to release of a finished product.  There is typically a check-list of activities and reviews that must have been completed before moving between phases (ie: from Alpha to Beta).  However, the required minimum number of code reviews (if you have one) should not be your only reason for conducting a review.  Any major change or addition to an existing application is reason enough to get a colleague to look at your code.  Some groups even require that someone sign-off on a change before it can be checked into source code control. While the timing of a review is largely a matter of preference, frequent reviews help ensure that reviewers are familiar with the code and can help minimize the amount of time required to explain complex modifications.


3. Have the Developer 'Walk-Through' the Application

One mistake to be avoided is throwing code 'over-the-wall' to a peer to get their approval, as this does not encourage a deep level of exploration of the code and does not guarantee that everyone has the same level of familiarity with the code.  The most effective reviews are led by the primary developer, who is responsible for walking through the logic of the application and explaining the design decisions behind the implementation.  The role of a peer is to ask questions that ensure the following questions can be answered to their satisfaction:


  • Is the code easy to maintain?
  • What happens if the code returns an error?
  • Is too much functionality located in a single VI?
  • Are there any race conditions?
  • Is the memory usage within acceptable limits?
  • What is the test plan for this code?


4. Select Qualified Reviewers

Instead of treating it as red-tape, reviews should be seen as an opportunity for developers to showcase their skill in front of peers who can appreciate and understand the craft of engineering software. Even if it isn't the most exciting event in your day, you can make the most of the review by selecting well-qualified and experienced peers who (ideally) are already familiar with the project.  The worst mistake is selecting under-qualified developers who do not know what to look for or what questions to ask.  Generally, for large-scale development, National Instruments recommends having at least one Certified LabVIEW Developer or a Certified LabVIEW Architect participate in a code review.


5. Define and Enforce Style Guidelines

There are a lot of LabVIEW style guides and recommendations throughout the community.  Examples include:

but ultimately, many development teams chose their own standards and guidelines.  The most important practice for ensuring long-term readibility and maintainability (in other words, when you find a bug in two years, can a new developer step in and fix it) is to pick a style and stick to it.  One of the most helpful tools for enforcing these practices is discussed next.


6. Perform Static Code Analysis (Automated Code Reviews) Before a Peer Review

The NI LabVIEW VI Analyzer Toolkit was designed to automate the review of coding practices and coding styles.  This static code analysis tool lets you define and configure over 70 of your own tests to enforce custom style guidelines and the reports this tool generates can serve as a valuable starting point for code reviews, especially on large, complex applications.  Examples of the tests include:

  • VI Documentation—Checks for text in the VI description, control description, and/or tip strip fields on all controls.
  • Clipped Text—Checks that any visible text on the front panel is not cut off. This includes text in control labels, control captions, free labels, and text controls such as strings and paths. The test cannot check the text inside listboxes, tables, tree controls, and tab controls.
  • Error Style—Checks that error connections appear in the lower-left and lower-right corners of the connector pane. This part of the test runs only if the connector pane wires a single error in and a single error out terminal. The test also checks whether an error case appears around the contents of the block diagram.
  • Spell Check—Spell checks VIs, front panels, and block diagrams.

A full list of tests can be found here.


One of my colleagues once made the statement, "the best code reviews are the ones that actually get done."  This is absolutely true, but the more you can perform regular, structured reviews, the more you can mitigate the risk of bugs and help ensure the longevity of the software.


Please share your thoughts, suggestions and questions on the topic of code reviews below.  What are your best practices and what are the lessons you've learned over the years?

Elijah_K
37361 Views
13 Comments

12-14-2009 3-09-34 PM.pngI often have customers ask me if they should be using classes in in their LabVIEW application.  Many of the people asking this question are long-term LabVIEW users who are new to the concept of an object-oriented development approach and they're struggling to identify how and where classes would benefit their application.  If you've ever asked this question, or if you've ever wondered where in your application you would use classes, I'll do my best to shed some light on the topic and explain some of the primary benefits...

To put it simply, classes aim to make it easier to represent collections of items within software.  Consider that real-world objects have attributes (colors, weight, size, etc..), and they also have things they can do (open, close, move, etc...).  As you might expect, object-oriented programming allows you to define a class of objects, all of which have attributes (known as properties) and things they can do (known as methods).

Consider some contrived examples:

  1. Vehicles - properties: color, size, weight, occupancy, fuel efficiency, methods: accelerate, brake, roll down windows
  2. Cell Phones - properties: battery size, call time, weight, size, methods: place call, end call, send text message
  3. Network Packet - properties: port, IP Address methods: send, print string

12-15-2009 10-44-57 AM.png

Now, you might be thinking to yourself, "Can't I just use a cluster?"  The answer is generally 'yes.'   In fact, if you've recently begun developing an application that relies upon a large, complex cluster that you're passing around your application, it may be an excellent candidate for replacing with a class.  This is especially true if you're passing around an array of clusters that are used to represent items that your program needs to be able to communicate and interact with. Making the switch from a cluster to a class offers several benefits - I want to highlight the following (although there are many more):

  1. Inheritance - so far, I've described explained that you can define a class of objects and give it properties and methods.  What makes this even more powerful is the ability to define children of that class, which have the same properties and methods, as well as some of their own.  They may also want to override the methods or properties of their parent class.  In my list of examples, I mentioned 'vehicles.'  As you can imagine, there are many different types of vehicles, some of which have very unique properties and things that they can do.  If you consider 'pickup truck,' as an example, one of it's properties might be 'bed size,' which wouldn't make any sense when applied to a car or a motorcycle.  
  2. Dynamic dispatching - If we have an array of similar objects, they likely share methods and properties.  In LabVIEW, we create wrappers using VIs to access and modify these values.  If we want the wrapper VI for a specific child class to do something different, we can create a VI to override the parent VI automatically.  LabVIEW will automatically run the version of the VI that is appropriate for the current class.  To put it simply, LabVIEW dynamically runs the VI based upon the class of the object supplied to it - this assumes that the object is a child of the generic class.

As a software engineer, it's important to be able to recognize the potential benefits and when the use of classes may make more sense.  LabVIEW is almost always used to interface with hardware, so the I/O in your application may be the perfect place to start.  Consider these examples:

  1. Hardware Abstraction Layers - This white paper on hardware abstraction layers illustrates some excellent examples of the benefits of classes and how they can be used to mitigate the risk of hardware obsolescence.  Classes have been defined for certain subsets of functionality (ie: a generic Scope).  When a specific instrument is connected or added, it inherits the properties and methods of the parent class, but may add additional functionality (ie: an Agilent Scope could be replaced with an NI Scope, or visa versa).
  2. Devices Under Test - Consider the task of testing a large number of very similar, yet slightly different devices such as cell phones.  One production line may be responsible for testing a variety of different types of phones, but they almost certainly all have similar properties.  The code can be written using a generic cell-phone class, but the method to execute a specific operation may require slightly different commands be sent to the test executive.  This can easily be added later on without major modifications to the code through the creation of a child-class.

Personally, I recently adopted the use of classes in my projects - I went back in one of my largest projects and replaced an array of clusters with an array of classes.  In my experience, the use of classes forced me to write code that has clearly defined 'ownership' - in other words, my code is cleaner and more modular because I've forced myself to say, 'this function is a member of this class - therefore, it is only responsible for operating upon the data available in this object' - this benefit is often referred to as encapsulation.  This helps me avoid unnecessary coupling between sections of your application that make reuse difficult later on.

The concept of a class is not unique to LabVIEW.  In fact, the use of classes is probably most commonly associated with C++, which was basically C with classes added. However, most modern programming languages, including Java and C#, heavily emphasize the use of classes. Classes were introduced to LabVIEW in 8.2, but have been continuously improved and refined since then.

For examples and illustrations of object-orientation at work, check out the following:

There is a lot more to be covered and discussed on the topic of classes in LabVIEW, including by-reference implementations and Endevo's GOOP toolkit.  Look for more in future entries.

A final tip: there are a number of settings and options when creating and managing classes, some of which are intended for advanced use-cases.  If you're having trouble figuring out how to configure something, I highly recommend consulting the LabVIEW documentation.  Also, feel free to post your questions below.

Elijah_K
15311 Views
11 Comments

In the world of large application development, performance is often critical.  Over the years, our investment in the LabVIEW compiler has aimed to ensure that most users don't have to spend time and effort worrying about how to improve the speed of the code or the utilization of memory (although you can, of course).  The LabVIEW compiler is good at identifying ways to optimize code and reduce the amount of required memory, but we're always trying to make it better...

The LabVIEW development team is actively working on improvements to the compiler that could make significant increases in execution speed, but we need the help of our users, and especially those of you developing large applications.  We need real-world applications from customers to benchmark so that we can understand how the changes we're making impact the execution performance.  Of course, one of the advantages for participants is that we can focus on any corner cases or areas of your application that you would like to see improved.

Please, if you have an application or an example you would like us to benchmark, contact me directly at Elijah.Kerry@ni.com.  Of course, your code would be used strictly for benchmarking purposes and would not be shared or reproduced externally under any circumstances. 

We can't wait to hear from you!

Elijah_K
11802 Views
0 Comments

Bula!  I'm back after several weeks of vacation (honeymoon in Fiji!) and I have some exciting announcements to share with all of you large LabVIEW application developers,and to those of you looking to become one!


I'd like to introduce a new 2-day class we just released, Managing Software Engineering with LabVIEW.  This course is designed to walk developers through each phase of the software engineering development life-cycle and explain how to apply the appropriate tools and practices to LabVIEW.  It begins with a look at source code control using Subversion, followed by requirements management, time/cost estimation techniques, peer reviews, code validation/testing, etc...


I spend a lot of my time explaining these tools and practices to customers and partners, but I know that it can be hard to really grasp how to integrate these into your daily routine after discussing the broad topic of software engineering for even an hour or two.  We do have a lot of information available on this community and ni.com/largeapps, but if you want some hands-on experience with a certified LabVIEW instructor, I highly recommend that you consider taking this class.


If you're interested in learning about this topic, you'll probably also be very interested in two related classes:


Customer Education 3-Day Class: Advanced Architectures for LabVIEW 

Customer Education 2-Day Class; LabVIEW OOP System Design

Elijah_K
11818 Views
0 Comments

In case you hadn't heard, LabVIEW 2009 and the LabVIEW 2009 Vision Module is available for 64-bit versions of Windows Vista and Windows 7, and a large number of NI Drivers already offer native support for 64-bit operating systems.

Because vision applications tend to work with some of the largest datasets, we focused on extending support to the Vision Module first.  However, we're very eager to hear from you regarding what you need next and why, so please let us know.  In the meantime, keep in mind that you can still run 32-bit versions of our software on a 64-bit version of Windows thanks to Windows-On-Windows (WOW).  It's a completely transparent emulation layer that makes applications think they're running on a 32-bit system.  Don't worry, you don't have to do anything different, but this means LabVIEW 2009 (64-bit) and LabVIEW 2009 (32-bit) can be installed side-by-side.

Click here to learn more about LabVIEW 2009 (64-bit)

Elijah_K
19766 Views
4 Comments

Today, we're very excited to officially announce the release of LabVIEW 2009!  If you visit the whats new website, you'll see the full list of new features, but I wanted to use this opportunity to point out some of the improvements in this version that I think the large application community will find especially interesting.  I'll be very eager to hear what you think and to get your opinion on these features.


Subversion Compatibility Improvements - If you're a TortoiseSVN user, like myself, you'll really appreciate this new .ini key.  Put 'skipSVNFolders=true' into your LabVIEW.ini file to filter .svn and _svnfolders from autopopulating folders, find/replace operations and mass-compilation.  This has already made my life a lot easier in just the few short months that I've had it enabled.  If you use Tortoise, put this key in your .ini file now!


Command-Line Differencing- We've exposed the graphical differencing capabilities of LabVIEW to allow you to use them from the source code control tool of your preference.  This is also a feature that I've really grown to appreciate when using TortoiseSVN - when I want to find out why a file is marked as having changed, I can now 'diff' it from Tortoise and LabVIEW highlights all my changes between versions.  I wrote a white paper that explains this is greater detail, which can be found here.


App Builder Log File Generation - Generate documentation of the version of your VI that is being used in a built application.  This feature was driven entirely by feedback we heard from large applicaiton developers who needed to prove that the validated code was actually going into the application they were deploying.  All build specifications in LabVIEW 2009 now have a new check box in the Advanced category to 'Generate build log file.'  This file will contain the timestamp and VI revision number for all VIs in the build.


Data Value References - Eliminate data copies and reduce memory utilization by creating references to large datasets in LabVIEW.  Any datatype in LabVIEW can have a reference created to it, which basically acts like a pointer.  For those of you who want to use a classes by-reference implementation, you can do so using this feature. See more.


SSL for Web Services - This is now the most secure method of communication in LabVIEW.  You can use the default LabVIEW certificate, or create your own to secure communication with clients.  Visit the Tools >> Options >> Web Services Security dialog to turn on this feature and setup a secure web server.


Create Friend Classes - Friend classes have access to private methods and properties of other classes, even if they are not a child of the class.


Unit Test Framework - We've improved the support for classes and made it possible to define inputs for your setup VI from the test case dialog.


Desktop Execution Trace Toolkit - Your trace will now include errors from VIs that have error handling.  This is valuable for quickly identifying where and when the error is occurring.


Code Complexity Metrics - VI Analyzer has several new tests that will help you understand the complexity of your code, including cyclomatic complexity.  This is valuable for gaining insight into how much software testing will be required.


Parallel For Loop - Forget splitting your data and creating several new loops!  Now you can make a single for loop inherently parallel by right clicking on it and selecting 'configure iteration parallelism.'  It's a mouthful, but this powerful features makes it possible for LabVIEW to scale your algorithm across however many cores are available in your system programmatically.  Learn more.


Recursion -
See 'Recursion.'  Seriously though, you can now recursively call a re-entrant VI in LabVIEW.  For those of you who are at NI Week, check out the Sudoku solver that uses a recursive algorithm on a Real-Time target to solve puzzles from a camera in seconds!   Learn more.


I've been bursting at the seams for a while in anticipation of this release.  Again, these are just a few of many features you'll find in LabVIEW 2009, so check them out and share your thoughts!

Elijah_K
16996 Views
0 Comments

It's hard to believe, but NI Week 2009 is just five weeks away.  If you haven't already, register for the conference, buy your plane ticket, get your hotel room, and get excited for a hot August down here in Austin, Texas!  As always, you can expect to see exciting keynotes with demonstrations of our latest products and innovative customer applications that push the limits of technology.  We also can't help but give sneak peeks at future products that are still in work, so be sure to keep an eye out.

I expect that everyone here will be attending the 'What's New in LabVIEW' sesison, but I wanted to point out a few other presentations in this year's preliminary NI Week program that I believe will be of special interest to those of you working on large LabVIEW applications.  These sessions in particular aim to cover advanced topics or introduce new tools that may help you improve your practices or the quality of your code.  Since it is preliminary, all these sesisons are subject to change.

In exchange for pointing these out, I'd be very interested to hear your thoughts on which sessions you are the most interested in seeing.  I look forward to seeing you all there!

Improving Development Practices and Software Engineering

New Software Engineering Tools for Large LabVIEW Applications - I'll be giving an overview of the software engineering process of LabVIEW, but focusing on how several new products, The Unit Test Framework, Desktop Execution Trace and Enhancements to VI Analyzer for analyzing code complexity, can be incoorporated into your development practices to improve the reliability and quality of your code.

Software Engineering with LabVIEW from Requirements to Deployment - VI Engineering will be presenting about their practices for moving a large application through the development life-cycle and the methologies by which they apply the well known V-model to development with graphical code.

Managing Large Applications with the Project Explorer and Source Code Control - I'll be demonstrating practices for managing an application properly with the Project Explorer, including the use of source code control using both Subversion and Perforce. I'll also show off some of the improvements you can take advantage of with the latest LabVIEW features and third party tools like the JKI TortoiseSVN Tool.


LabVIEW Code Reuse for Teams and Large Projects - JKI, the makers of VIPM, will be discussing practices for team-based development in LabVIEW.  Learn how to create a shared repository of reusable VIs and use analytics tools to report your organization’s software reuse metrics.

Advanced Technical Sessions

Tips and Tricks to Increase LabVIEW Performance Speed - Darren, from LabVIEW R&D, will be sharing some of his acclaimed 'nuggets' of information.

Best Practices for Memory Management and LabVIEW Code Optimization - This session will be presented by R&D on how some of the latest features can be used to boost your VIs performane and decrease the memory footprint.


Multicore Design Patterns in LabVIEW - We're finding new ways to push performance and take full advantage of multicore computers.


New Features in LabVIEW Object-Oriented Programming - This session will be presented by members of LabVIEW R&D who worked on these features and are eager to share their latest imrpovements.  I wish I could tell you more now, but you'll just have to wait!

Deploying and Replicating Embedded Systems - Examine the technical challenges engineers face when deploying and replicating embedded systems, and explore best practices for overcoming these challenges.

There are a lot of other fun ones to keep your eye on.  You'll also find me presenting on Web services and the Upgrade Experience, so please stop by. Session times and locations are still unnanounced, but keep checking ni.com/niweek for the latest new and info!

Elijah_K
13598 Views
7 Comments


After a few weeks of vacation, I’m back in Austin and have some news for all you Large LabVIEW App developers out there.  Scripting is now officially available!

For all you ‘rebels’ who have been using scripting for years, you can now do so with a clean conscience.  Download the installer from this link and follow the instructions to activate your new scripting license.

For those of you who are unfamiliar with scripting, this is not to be confused with scripting languages like Python or Perl.  LabVIEW scripting exposes additional VI Server properties and methods that allow more programmatic control over the development environemnt.  Why is this valuable?  For an example of what can be done with scripting, check out JKI’s new Right-Click Framework.

So why didn’t we expose this sooner?  Scripting was initially developed for internal programming purposes, but was soon discovered by LabVIEW aficionados.  Concerns regarding forward compatibility and unsupported functionality were one of the largest reasons we didn’t make this formally available before now.  For now, LabVIEW scripting resides within NI Labs and is not formally supported by the Applications Engineering group.  To discuss questions, feedback or any problems, visit the API Community.

Originally posted by ekerry at http://ekerry.wordpress.com/2009/06/01/scripting-for-labview-released/

Elijah_K
12883 Views
0 Comments


Distributing code and re-use libraries can be a surprisingly difficult task.  Luckily for us, our friends at JKI have come up with an extremely elegant and professional solution for LabVIEW called the VI Package Manager.  If you’ve never heard of this tool, I strongly encourage that you check it out.  In addition to making code management easier, VIPM lets you download all the OpenG libraries, which adds some very useful functionality to LabVIEW.

To understand when VIPM is especially useful, consider several common examples of when you want to distribute your code:

  1. You have a set of common VIs that you want to re-use in multiple applications
  2. You are working in a team-based environment and other developers need your code
  3. You want to share a set of development tools with a colleague
  4. You want to post VIs online for the community to use

These all seem simple enough, but now lets throw a wrench in the works with a few common tasks:

  • Updating code - it’s common to make changes or updates to shared libraries during development.  All team-based environments should be using some form of source code control to track and manage changes from multiple developers, but it can still be challenging to make sure you have the right version of all the subVIs installed and in-use at the same time.
  • Professional distribution - how do you share code in such a way that it minimizes the work required by the recipient?  Instead of having to move multiple files into the correct directory locations, everything is installed automatically and appears on the palettes.
  • Dependency management - ever opened up an application on a new machine and discovered that it’s broken because you forgot some dependencies from a re-use library or a toolkit you forgot to install?
  • Multiple LabVIEW Versions - how do you make sure that the updates have been made available in all versions of LabVIEW, and not just the most recent version?

As you’ve probably already guessed, these are some of the biggest challenges that VIPM is designed to help with.

There are two flavors of VIPM: the professional version facilitates creation of ‘VI Packages’ and the free version enables anyone to install and manage these packages.  You can download packages from a number of places online, or VIPM can automatically scan dedicated servers to see what’s available.  I’ve also spoken with a number of LabVIEW users who are using the professional version of VIPM to distribute code internally during development.

As an example, Simon recently posted a set of custom controls for use in LabVIEW.  Minutes after making them available, Jim had created a package and posted it on the document, which made installing them in LabVIEW a breeze.  A few clicks, and the swanky new controls were in my controls palette.

ni_lib_ni.com_inspired_controls-1.1.0-1.vip

These were updated a few times, and each time I just downloaded the package and VIPM took care of replacing the old controls.

Download VIPM and give it a try yourself.  Thanks to JKI for making such a great tool!

Download VI Package Manager


Originally posted by ekerry at http://ekerry.wordpress.com/2009/04/23/vipm-makes-managing-re-use-libraries-in-labview-easier/

Elijah_K
16661 Views
1 Comment


If any of you subscribe to Joel on Software, you may have come across this article where he provides a 12-step checklist for developing quality software. These recommendations are just as true of LabVIEW development as they are of any other programming language:

  1. Do you use source control?
  2. Can you make a build in one step?
  3. Do you make daily builds?
  4. Do you have a bug database?
  5. Do you fix bugs before writing new code?
  6. Do you have an up-to-date schedule?
  7. Do you have a spec?
  8. Do programmers have quiet working conditions?
  9. Do you use the best tools money can buy?
  10. Do you have testers?
  11. Do new candidates write code during their interview?
  12. Do you do hallway usability testing?

In Joel’s opinion, if you can’t answer ‘Yes’ to at least 10 of these, you have serious problems with your development process that could slow you down and lead to low-quality code. I went through these with NI’s NPI process in mind and happily scored a 12.

As a LabVIEW developer, if you would like to share insights or feedback on any of these topics, we’re eagerly hoping to hear from you…


Originally posted by ekerry at http://ekerry.wordpress.com/2009/04/10/applying-12-steps-to-better-software-to-labview/

Elijah_K
12241 Views
0 Comments


To anyone who is afraid or worried about upgrading, we hear you and we’ve made changes to help.  Back in January of this year, David Fuller wrote an entry on John Pasquarette’s blog describing what we’re doing in R&D to reduce problems associated with upgrading.  To summarize:

  • Our move towards an annual release schedule results in incremental changes and updates, which mitigates the risk associated with introducing several completely new features at once, as we did with LabVIEW 8.0.
  • The regular release cycle provides more opportunities for guidance from customers as features evolve - consider the changes to the LabVIEW Project Explorer between 8.0 and 8.5 as an example of this evolution.
  • Internal alignment across all teams means better coordination between all software products, drivers, and hardware

However, it’s important to realize that there is something you can do to help.  Try the Beta of LabVIEW 2009.  Upgrade issues are top priority for us - the trick has always been finding these problems, and for that we need your help.

As of April 2nd, the entire platform of the next version of LabVIEW is now in Beta and available for your evaluation - this means all software, toolkits and drivers.

As always, the new version contains new features that aim to improve developer productivity and application performance.  To see a list of new features and provide feedback to the community, click here.

Finally, for more resources on best-practices for upgrading your application, consult this guide on ni.com.


Originally posted by ekerry at http://ekerry.wordpress.com/2009/04/03/taking-a-bite-out-of-upgrades-and-preparing-for-labview-2009/

Elijah_K
23593 Views
6 Comments

The flexibility of front panel objects in LabVIEW is something many people, including myself, take for granted.  We quickly drop down charts, knobs, and sliders, leaving them unchanged, and as a result, most LabVIEW programs have an unmistakably similar look and feel.  Of course, this makes it much easier to spot in a lab or during cameo appearances on shows like MythBusters, but many people are looking for ways to make more impressive and even 'sexy' user interfaces.


The success of commercial products like the iPhone are clear examples of the growing desire for intuitive user interfaces, but the world of engineers and scientists is not exempt.  There are a lot of practical reasons why a clear and appealing UI is valuable for a large LabVIEW application, as it can reduce learning curves and improve the effeciency of the user.


What many LabVIEW developers don't realize, is the level of customization and flexibility that LabVIEW controls and indicators provide.  Realizing this, my friend and colleage, SimonH, set out to see just how easy it would be to make some impressive controls and indicators for LabVIEW that broke the mold.  He's posted his first few examples in his new UI Interest Group, but I happen to know he's got a lot more up his sleeve.  Join his group and look for more soon!


http://decibel.ni.com/content/servlet/JiveServlet/downloadImage/102-4028-2-3603/ni.com+theme+-+Preview+Image.png

Elijah_K
18579 Views
2 Comments

About a month ago I wrote a blog on LabVIEW application architectures, but I wanted to supplement that with links to more advanced resources that are specific to certain applications and offer a more holistic insight into the task of architecting your LabVIEW application.

  • A Primer for Machine Control - If you're building a large system for machine control using CompactRIO and aren't sure where to start, this should help.  It includes example applications and insights into networking and how to manage multiple tasks.

  • TestStand Architecture Series - as automated test systems are becoming larger and more complex, it's becoming increasingly important to architect your code to ensure scalability, quality and re-usability.  This series of content was written largely by NI Alliance Partners who have extensive experience with applications of this nature.

Architecting applicatioins in any language is one of the biggest challenges any software programmer faces.  Compared to the task of designing code, the task of actually developing it is often the easiest par.  Without carteful consideration, many programmers get the 're-factor' twinge about half-way into the development process.  If any of this sounds familiar, spend some time looking through these resources to get some insight into paradigms that might help you and your application succeed.

Elijah_K
17155 Views
0 Comments

I read a great article in The Economist this morning entitled 'Software that makes Software Better.'  This article discusses the growing role and importance of development tools for improving the quality of software and talks about the growing challenge developers face.

This article is proof of how far we've come in the last half-century.  We're seeing a number of trends converge and software engineers are struggling to keep up.  Development times are shorter, team size is bigger, the criticality of the applications is increasing, the expectations for quality and reliability are greater, code has to be modular and re-usable, and on top of all this, developers are expected to learn how to use numerous, poorly integrated tools that claim to make everything easier.

I've had a number of engineers, especially those in the mil/aero industry, tell me that they spend a mere 20% of their time actually developing code.  This may be slightly over-exaggerated, but a study conducted by the Standish group revealed that this number was closer to about 30%.  The rest is dedicated to refining requirements, discussing work with teammates, documenting, unit testing, integration testing... you get the picture.

The good news is that we're making progress.  As another study revealed, the Standish group "found that 35% of software projects started in 2006 were completed on time, on budget and did what they were supposed to, up from 16% in 1994; the proportion that failed outright fell from 31% to 19%."

LabVIEW is being used in larger applications, with larger code bases, and larger development teams.  Of course, graphical programming inherently abstracts many of the common tasks text-based developers struggle with during development, and with a set of tightly integrated software engineering tools, we aim to automate and improve the experience of applying software engineering practices to LabVIEW.  If you're interested in learning more about best-practices for software engineering with LabVIEW, visit ni.com/largeappsor go to ni.com/SoftwareEngineering to see a list of products that can help.

Elijah_K
12046 Views
0 Comments

There is perhaps no more appropriate place to announce the arrival of two new toolkits for large application development than here in the Large LabVIEW Application Community.  The Desktop Execution Trace and Unit Test Framework Toolkits have been introduced to automate common practices for software engineering and help developers improve code quality.

The Desktop Execution Trace Toolkit facilitates dynamic code analysis for low-level debugging of applications during runtime.   The Unit Test Framework is designed for automated unit testing and requirements-based validation of software.

Feedback from users in highly regulated industries was one of the primary motivations for creating these products.  As we continue to invest in LabVIEW for large applications, we are benefited by feedback on these products and the needs of our users.

So to those of you who have had a chance to use these and similar tools, please use this community as an opportunity to share and exchange your ideas.  We look forward to hearing form you.

Elijah_K
16266 Views
1 Comment

One of the most appealing things about LabVIEW is that you don't need to be a computer scientist to write fairly large and complex software. For many, their journey with LabVIEW starts in school or at a benchtop with a simple application to quickly acquire some data. Once they're hooked on the ease of graphical programming, it's only a matter of time beforethe ideas start flowing, and pretty soon they're off developing amazing applications like a mind-controlled wheel chair, the world's largest particle accelerator, or how about a 3D Space Ship that flies through a starflied.

The problem is that the same approach people use when throwing together a prototype or a proof of concept will land them in a world of pain if they don't ever stop and consider fundamental questions like, "how should I architect this application?" All too often, I see the tangled mess of spheghetti code emerge as the result of thoughtless, or ill-planned development.

badCode.png
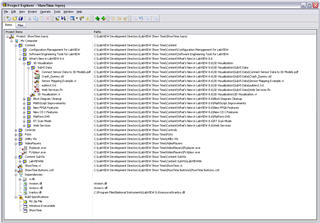
For most people, their very first experience with LabVIEW leads to messy, un-readible code.  Even LabVIEW gurus have humble beginnings.  The expert G developer, D Natt, was kind enough to send me a screenshot of his very first LabVIEW program. Let the image on the right serve as an example of what not to do. If you find yourself wishing you had 8 more screens to see a single block diagram, or if your block diagram looks anything at all like this one, you may want to consider giving more thought to the architecture of your application. As an exercise, see how long it takes to determine what the VI on the right actually does.

It's important to realize that spaghetti code is not unique to LabVIEW. As someone who started with text-based languages, I've seen plenty in all sorts of different languages. The difference is that it's a lot easier to write graphical code that will run, even if it's completely illegible. When the result doesn't work correctly or yields unexpected performance, it can be very difficult to debug and many prefer to point the finger at LabVIEW rather than acknowledge their own lack of foresight or experience.

So lets turn our attention to how we can architect our LabVIEW application. Start with the main problem you're trying to solve and figure out what the software needs to be able to do in order to be considered 'succesful.' The criteria that emerges from this assessment will help you make informed decisions about how the code should be structured. This is, in many cases, the product of experimenting, prototyping and developing proof of concepts that highlight the areas of difficulty and help you understand what type of information or data will need to be shared between different 'pieces' of an application.  At this point, we need to take a step back and make sure we understand design patterns.

LabVIEW Design Patterns.pngA 'Design pattern' refers to a template that serves as the building blocks for software. If you have an application that requires a responsive user interface, consider how many other developers have been faced with the exact same requirement. You're not alone, and there's no reason you should be starting from scratch. Design patterns are universal to programmers in any programming language. They save you time by helping you avoid reinventing the wheel and give us the solutions to common problems that have evolved over time to be the best, and most appropriate solution. If you're new to design patterns, check out the File >> New dialog in LabVIEW (show on the left). This is a great place to get started with some basic design patterns that are very specific to LabVIEW. Be sure to read the descriptions to understand exactly what problemsthey can best help you solve.

I also recommend visiting expressionflow.com. Anthony Lukindo wrote an excellent, indepth article on the QSM-PC (Queued State Machine - Producer / Consumer) design pattern, which is a fairly common and very useful pattern for a-sychronous computations in a fairly large application.

For those of you familiar with text-based design patterns, AristosQueue posted a great article filled with examples of how to map classics like the Factory Des...

The JKI State Machine also serves as another great template for developing clean code.

Architecting a high-quality piece of code ensures that it's readible, scalable, maintainable and reduces the chance that errors or incorrect behavior will occur. I've focused a lot on design patterns, but don't lose sight of the fact that just is one small piece of the puzzle. You'll also want to think about how the application can be modularized and design APIs early on. Oh and of course, documentation is paramount.

One final word of caution: keep it simple and pick the archicture best suited to what you're doing. But as always, have fun

Elijah_K
12613 Views
0 Comments

I had a thread on the LAVA forums brought to my attention on the topic of 'What is your LabVIEW application development process?, Best and worst development practices?'  This thread prompted an interesting discussion regarding some of the common challenges developers face when tackling a large application.

One of the primary goals of creating this group in the new NI community was to foster conversation and dialog amonst those of you working on these large LabVIEW applications and to share your insights on what you've learned from experience - both good and bad.  I'm excited to see that this same exchange is taking place in a number of different venues, including the thread that I stumbled across and the new wiki on LAVA dedicated to Software Engineeringhttp://zone.ni.com/devzone/cda/tut/p/id/7117

Several people mentioned the difficulty of requirements management in this thread.  The consensus amongst software developers is that requirements gathering is a difficult art to master, but the fact is that it can be extremely costly if overlooked.  After analysis of 63 different software projects at companies such as IBM, GTE and TRW, we can actually put a number next to the 'cost of getting it wrong'

Cost of getting it wrong.png

The fact is that LabVIEW often falls victom to oversight of requirements as well as a lack of due dillegence for other software engineering practices due to the fact that it is so commonly used for rapid prototyping of small applications.  Too often, I've seen developers try to scale these initially small projects into much larger and more complex systems without giving proper thought to requirements and especially to code architecture.  Good requirements are typically generated as a result of iteratations between prototyping and documenting the findings of prototyping, which then lend themsleves to proper archiecture and better insight into how an application should be designed and help developers apply sound software engineering practices to ensure quality and reliability.

If you're interested to learn more about requirements management with LabVIEW, check out some of these links.

Elijah_K
24951 Views
3 Comments

Is LabVIEW A Programming Language?

Yes.

As a LabVIEW fanatic and enthusiast, I commonly field this question from customers and text-based programmers on a regular basis.At first glance, graphical programming appears abstract and so radically different from C and similar languages, that for many it’s hard to grasp how this grid of wires and colored blocks could possibly represent code.

  While studying for my degree in computer engineering at the University of Missouri, I regularly programmed in C++, Java, and spent many long hours in labs going through the painful process of writing x86 assembly and even VHDL.I was also an avid web developer and had written many programs in a combination of HTML, PHP and Adobe Flash for a research lab at the school.Sadly, I had never used LabVIEW or graphical programming, but I did have one friend who kept egging me on to try it out.He claimed it would make my life much easier and that I could do all the same things I was already doing in a fraction of the time.

When I finally learned LabVIEW after beginning work at National Instruments, it was like a whole new world had opened up to me.It all made so much sense and I found myself wishing I’d listened and saved myself many all-nighters in college.

If you look back at 1986, the year LabVIEW 1.0 was released; graphical programming was a part of the natural progression. Apple had just announced the first graphical user interface ever for the commercial market.The use of computers had previously been entirely through the command-line and it seems logical that only text-based programming was around up until then.

Enter graphical interfaces… enter graphical programming.It was simple at the time, but the concept of dataflow made the representation of information and the relationships between operations to be performed much more apparent and easy for someone without a programming background to understand. It took off and became the foremost tool for anyone who wanted to control a bench top instrument and perform analysis in software.

  These days, LabVIEW has evolved dramatically.  The abstraction LabVIEW provides still enables scientists and engineers to solve complex problems without worrying about lower-level details, but it still has the ability to control more granular aspects of your application and push that same graphical code down to the pin with FPGAs and embedded targets.What would’ve taken dozens of pages of VHDL can now be accomplished with just a few simple VIs in graphical code.LabVIEW is object oriented and open; developers can re-use libraries developed in .NET or other languages.Users can build professional, end-use applications for commercial re-sale.

The flexibility of the development environment even allows users to combine different models of computation within a single application.Dataflow can be combined with text-based *.mfiles or tools like Statechart to take advantage of the strengths of every paradigm.All of these different models of computations are compiled by LabVIEW into a single binary.

Because of the abstraction that is inherent to graphical programming and the investment we’ve made in the compiler, LabVIEW is even smart enough to perform optimizations in the background that result in performance that can often exceed that of text-based counterparts.This is especially true when optimizing applications for multiple cores, which is a growing concern as the personal computer continues to offer consumers more and more cores within a single machine without any significant gains in clock frequency.

At National Instruments, we even develop many of our software products and a large portion of LabVIEW itself in LabVIEW.For those of you who use Vision Builder, you’re using a LabVIEW application that spans roughly 5,000 VIs and is developed by a team of about 3 individuals.The fact is that LabVIEW is a programming language in every sense of the word and it presents users with more options and more flexibility than other monolithic environments.

Why do so many people still refuse to believe LabVIEW is a programming language?Perhaps after 23 years of development, LabVIEW is still just that far ahead of its’ time.

Share your thoughts on LabVIEW as a Programming Language!  Leave a comment below.

Elijah_K
13559 Views
0 Comments

Anthony Lukindo wrote an excellent article on expressionflow.com that explains how to utilize a queued state machine architecture with multiple producer / consumer loops.  The example he uses in this article draws from several of the fundamental design patterns that should serve as the building blocks for almost any new LabVIEW application (see image below).

PC-QSM.png

If you've never seen them, make sure you review the design patterns that ship inside of LabVIEW as starting points for your applications - even simple ones.  You can navigate several Frameworks for development by clicking File >> New in LabVIEW.  The dialog that will appear is shown below.  Note the descriptions for each design pattern under the image on the right.

LabVIEW Design Patterns.png.

If any of you want to add your own design patterns to this dialog, you can.  This is potentially useful for groups of developers who would need to use a common, custom template regularly in their work.

To add a template, follow the pattern used for the existing patterns, which can be found here: C:\Program Files\National Instruments\LabVIEW 8.6\templates\Frameworks\DesignPatterns

This should include a png thumbnail and *vit template file.  Don't forget to enter descriptions in the VI Documentation Property so that users will know what they're getting themselves into!

Elijah_K
14960 Views
2 Comments

Since this is my first blog entry, I feel it’s only appropriate that I begin with a discussion about how to start developing a LabVIEW application.  These days, it’s not uncommon for some of the more complex LabVIEW applications to span thousands of VIs, which can pose a number of challenges if not given proper thought.  What many don’t realize is that they can simplify their life and perhaps keep more of their hair by knowing how to use some best-practices combined with some of the latest tools in LabVIEW.

And this is true for all applications, large and small - be it one developer or 50.

The nature of graphical programming offers scientists and engineers a clear advantage when it comes to reducing development time and rapidly prototyping complex systems that need to interface with hardware.  However, as a result, many jump directly into writing code without really giving proper consideration to some of the more mundane practices.  Is this you?  Have you ever thought to yourself…

·         “My files are so disorganized - I don’t even know if I’m working on the latest copy of my code!”

·         “Oh no, someone else overwrote all my work with their changes – I just lost a week’s worth of work!”

·         “I’m too scared to rename or move subVIs because LabVIEW will never find the right ones and I’ll have to re-link them all!”

·         “I want to compare my latest changes with a previous version to examine exactly what the differences are!”

If you’re anything like me, you’d probably rather be coding in LabVIEW than thinking about any of these things, but I’ve seen too many developers paint themselves into a corner by ignoring some of these until the last possible second. This is not an exhaustive list, but for the sake of today’s entry, we’ll keep it simple.

For anyone reading this that comes from a Computer Science or Software Engineering background, you’ve probably already heard of SCM, or software configuration management.  For those of you who have no idea what I’m talking about, this just refers to a combination of tools and practices that developers have been using for years to avoid some of these common problems.  I’m going to discuss some of the tools that you can take advantage of in LabVIEW.

Perhaps the most fundamental and important tool for any and all LabVIEW developers is the Project Explorer.  Those of you who have just recently transitioned from 7.1 or earlier may still be fighting adoption, but hear me out – this tool was designed to make your life easier - you just have to know how to use it.

The Project debuted with LabVIEW 8.0 to mixed reviews.  For many who had grossly outgrown using their operating system’s file browser (ie: Windows Explorer or Finder) to manage all their files, the Project Explorer was a welcome relief and had a lot of potential.  However, as with any completely new features, there was plenty of feedback and discussion on what could be improved.

Fast forward two years.  LabVIEW 8.5 came out in August of 2007, and with it came a revamped version of the Project that incorporated much of the feedback we’d been hearing from you.  It is this version and all the latest features that I’m going to be discussing in this entry.

Project Explorer.jpg

This is a screenshot of a Project in LabVIEW 8.6 that happened to be open on my computer while writing this blog.  It’s true – I code in LabVIEW for fun whenever I can, but I always use the Project and source code control (note the checkboxes).  Friends don’t let friends code without the Project.

I have a golden rule that I preach to all LabVIEW developers who are just starting out with the Project: “Think of the Project Explorer as an opportunity to tell LabVIEW: ‘here are my files – this is what I intend to use in my application – nothing more, nothing less.’ By doing this, LabVIEW is smart enough to help you make informed decisions and manage your application.”  To clarify, you can and should use the Project to manage all of your files – not just the VIs.  Note that in my screenshot I have VIs, as well as PDfs, videos, DLLs, documents – anything and everything related to my application.

So what exactly can LabVIEW’s Project Explorer tell you if you use it correctly?  It can show you your entire system – including all the hardware targets and build specifications your project uses.  It can warn you when you’re potentially using the wrong subVI.  It can tell you when moving or renaming a file will change a link from another caller.  It can instantly tell you when you’ve added a new file on disk.  It can tell you when someone else is modifying a file and help you track down the latest version of that file.  It can show you, graphically, the differences between your revisions and the last changes someone else made (also known as ‘diffing’).  The Project Explorer can even tell you if you’re breaking my golden rule (subVIs you haven’t yet added appear in a flat list under dependencies).

For those of you scratching your head at source code control (SCC), I’m referring generically to third party tools that are commonly used for large application management.  They essentially serve as an intermediate layer between you and the centralized storage location for all your code.  You, as a developer, communicate with SCC by telling it things like “I’m going to modify this VI.”  Through this exchange of information, other developers can then be made aware of potential changes, which avoids overwriting work and helps the rest of your team know when changes were made and who made them.  SCC is beneficial even for individuals who just need to keep track of all of their revisions.  I myself keep a Perforce server on my laptop which I use to store and manage all of my side projects (Perforce is free for individual use – check it out at perforce.com).

Interested in learning about how to set up the Project Explorer to take advantage of all these features?  You can find technical details on all the topics I’ve mentioned here and more on this wiki: Managing LabVIEW Application Development in the Project Explorer.  This guide provides best-practices and technical how-to’s for using the Project, so be sure to check it out and let me know if you have any questions or feedback.