- Document History
- Subscribe to RSS Feed
- Mark as New
- Mark as Read
- Bookmark
- Subscribe
- Printer Friendly Page
- Report to a Moderator
- Subscribe to RSS Feed
- Mark as New
- Mark as Read
- Bookmark
- Subscribe
- Printer Friendly Page
- Report to a Moderator
If you are using an Axis Ethernet camera, you may have noticed that by default the camera is referred to by a name instead of an IP address in the Vision Processing VI as shown below.
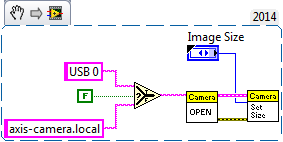
However, running the Vision Processing VI this way often leads to an error.
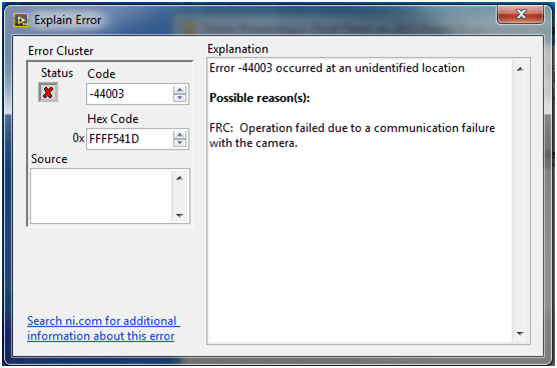
This could be either because the name of the camera has not been configured, or because the camera and the roboRIO are not connected to a network switch.
Name Has Not Been Configured
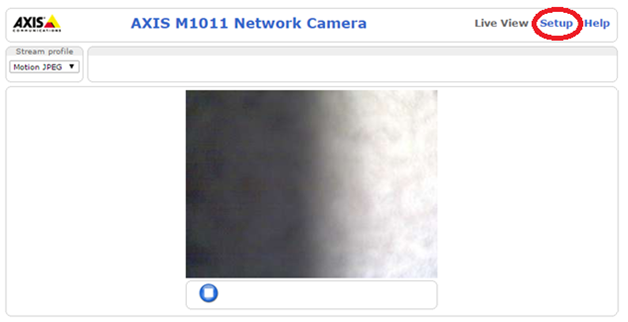
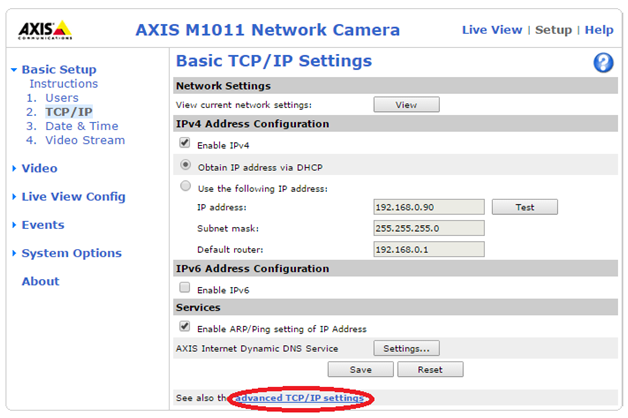
You can configure the name of an Axis camera from its web interface by typing the IP address in a browser window. In the web interface, go to the “Setup” screen and log into an administrator account on the camera (by default, the username should be root and the password should be blank).
If you are asked to assign a password to the camera, remember to write it down somewhere for later use! From here navigate to the TCP/IP settings, and choose the “advanced TCP/IP settings” option at the bottom.
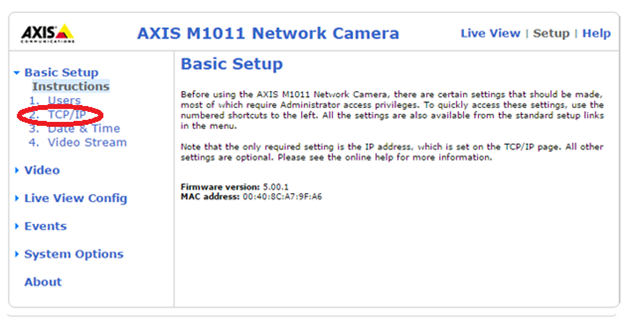
Under the “Host Name Configuration” section, choose the option to input a custom name and enter it in the “Use the host name:” field.
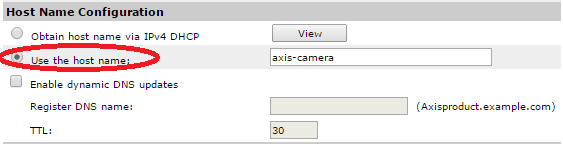
Now, you should be able to go into the Vision Processing VI and use the name you have given the camera to look up the device, rather than the IP address. At this point you should also be able to bring up the image on the FRC Dashboard.
Not Connected to a Network Switch
In order for the camera to have its IP address associated with a string name, it has to be connected to a Domain Name System (DNS) server. This server contains a table that links the name to the camera’s IP address and provides the functionality for translating between the two. If the camera and the roboRIO are both connected to the internet through a network switch, they will have access to a DNS server and this will allow you to identify the camera by name. However, if the camera is directly connected to the roboRIO it will not have the proper resources to look up the camera’s IP address from its name. Once the camera’s name has been configured through the web interface, you can connect both the roboRIO and the camera to a network switch with Ethernet cables to begin using the name in your LabVIEW code.
- Mark as Read
- Mark as New
- Bookmark
- Permalink
- Report to a Moderator
The name change is also required for the image to show up on the dashboard.
- Mark as Read
- Mark as New
- Bookmark
- Permalink
- Report to a Moderator
I have tried several times with fresh starts each time and I just can't get the dashboard to not return the camera not found error. I have gone through several tutorials all telling me the same things, I do the following:
1) Reset the camera
2) use the camera assistant that came with this years software and it finds the camera and I hit the Apply button and it says it has set the camera up.
3) Go to the camera via browser and create new admin password.
4) Go to the Advanced TCP/IP settings and click on the radio button for Use the host name and enter axis-camera
No workie 
so question, I see in the vision code, that the first constant is set to axis-camera.local, I believe that is an ipv6 thing, I have not seen anything about changing the camera to ipv6. Could that be the problem? Is everyone else not having an issue with connecting to the camera?
I know the camera works fine because I can see the image in the web console for the camera.
- Mark as Read
- Mark as New
- Bookmark
- Permalink
- Report to a Moderator
Edited to include this, thank you sciencewhiz!
- Mark as Read
- Mark as New
- Bookmark
- Permalink
- Report to a Moderator
Hey sforsyth,
How is your camera connected to the network? Is it directly connected to the roboRIO, or is it connected to a network switch/router? If you haven't already, I would definitely post a discussion to the FRC forums about that: https://decibel.ni.com/content/community/academic/student_competitions/frc?view=discussions
Have a great day!
sassyaspy
