Overview
We’ve developed a library of VIs we would like to package and distribute to end-users. In the previous exercise, we built this library into a package using VIPM Package Builder. Now, we would like to reorganize the palette items so they make sense to our users. We are going to utilize the Package Builder in VIPM to edit the palette for a library of VIs, build and install the package, and view our changes in LabVIEW.
Creating a Palette
- Switch to the Palettes category.
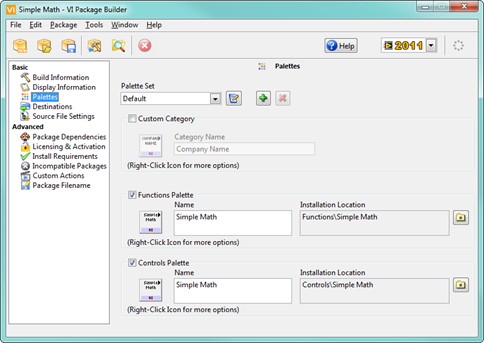
- From this category view, there are several options available:
- Palette Set – Here you can add and remove multiple palettes for a single package. We will leave this as default for this exercise.
- Custom Category – This allows you to add a custom Palette category, this can be used to group multiple libraries into a single Category for your company.
- Check this box, and enter your company name as the Category Name.
- Right-click the icon and choose Edit Icon if you would like to edit the icon in LabVIEW’s Icon Editor or simply choose to Autogenerate Icon.
- Functions and Controls Palettes – Here you have three options:
- Palette Icon – Click the icon to view your palette as it will appear in LabVIEW, right-click the icon if you wish to modify the icon.
- Name – This is the name of your palette, as it will appear to users.
- Installation Location – This specifies where your palette is installed, click the folder icon to change to either a target-specific palette set (such as FPGA or RT) or to install your palette within one of the existing LabVIEW palette categories.
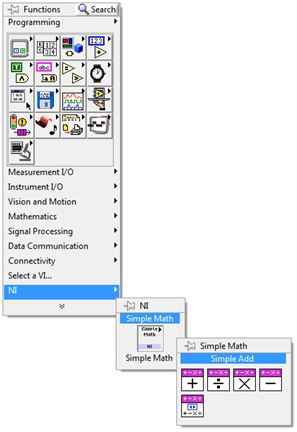
- Click the Functions Palette icon to open the palette view.
- Let’s reorganize the palette items so they appear in a more logical order for our users

- Close the palette view window when finished.
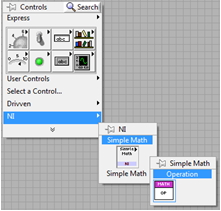
- Click the Controls Palette icon to view the palette view. Notice an additional layer exists; let’s remove this layer so our control is not buried in a subpalette.
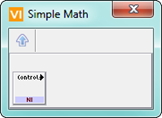
- Right-click on the Controls subpalette icon in the palette view window and select Delete.
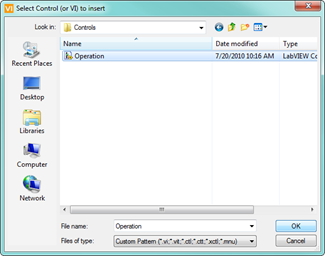
- Now, right-click the empty space in the palette view window and select Insert > Control or VI.
- The file-browser should appear similar to the following image:

- Open the ‘Controls folder and select Operation.ctl. Click OK.
- Notice your palette view window now contains just your custom control:
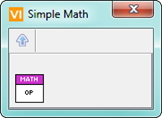
- Close the palette view window.
- Now that we’ve made changes to the palettes, let’s build this package and test it in LabVIEW. Click either the Build Package icon on the toolbar or select Package > Build (Ctrl + B) from the menu.

- This time, select Open Package in VIPM Main Window when the build completes:

- Make sure LabVIEW 2011 is selected and click Install.
- Click Continue.
- Click Finish.
- Now, in LabVIEW create a new VI and open the functions and controls palettes to view the changes you’ve made to your package.
Next Steps
Now that we have created a palette, the next lesson focuses on adding examples, Help files, and Tools Menu items. Click here to return to the table of contents.
