- Document History
- Subscribe to RSS Feed
- Mark as New
- Mark as Read
- Bookmark
- Subscribe
- Printer Friendly Page
- Report to a Moderator
- Subscribe to RSS Feed
- Mark as New
- Mark as Read
- Bookmark
- Subscribe
- Printer Friendly Page
- Report to a Moderator
Wireless Communication Between Two Real-Time Targets
We have been working on a project that involves two realtime targets speaking to each other independently from a computer. We also used cheap WIFI (IEEE 802.11N) routers to make the data between both of the targets be sent wirelessly. The way the two targets communicate with each other is by using network published shared variables. This has a range of use cases such as two cRIOs working on the same system where a LAN network is not present or in autonomous robotics projects.
Requirements
- LabVIEW with RealTime and FPGA Module
- Two realtime targets (Tested with cRIO 9014 and sbRIO 9636)
- Two Routers (Tested with TPLink TL-WR702N)
Network Setup
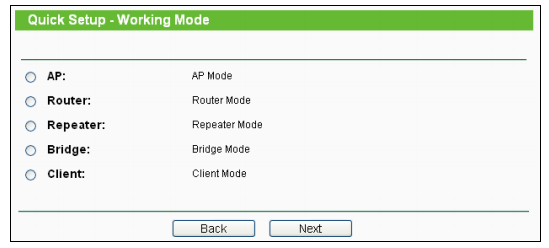
The first step is to setup the routers. The routers we used where TPLink Mini routers. These can be powered off the 5Volt USB port found on some sbRIOs and cRIOs making our system much more integrated. To get both of the routers connected with each other we had to set one of the routers into Bridge mode. To do this you have to connect a computer to the router either using WIFI or an Ethernet cable. Once connected if using the TP link routers here you will need to change your computers IP address so it's on the same network. These routers default IP address is 192.168.0.254 so set your computers IP to 192.168.0.X and ensure the subnet is 255.255.255.0. You can then type the routers IP address into your browsers search bar. From this page you can configure the router to bridge off the other. You should also change one of the routers IP addresses as they have the same default. Full details on how to configure the router can be found on the user guild for this please, See link and/or attached PDF:
http://www.tp-link.com/en/products/details/?model=TL-WR702N#down
Next you will have to setup the IP addresses on the real time targets. Details on how to setup the cRIO and sbRIO IP addresses can be found on the following page:
http://www.ni.com/gettingstarted/setuphardware/compactrio/staticip.htm
The IP addresses I set everything up with and will reference to in the rest of this guide are as follows:
Router: 192.168.0.254
Router in Bridge mode: 192.168.0.253
Computer: 192.168.0.1
cRIO 192.168.0.2
sbRIO 192.168.0.3
To test the network use WIFI to connect to one of the routers. you should see both of the targets appear under remote systems in MAX.
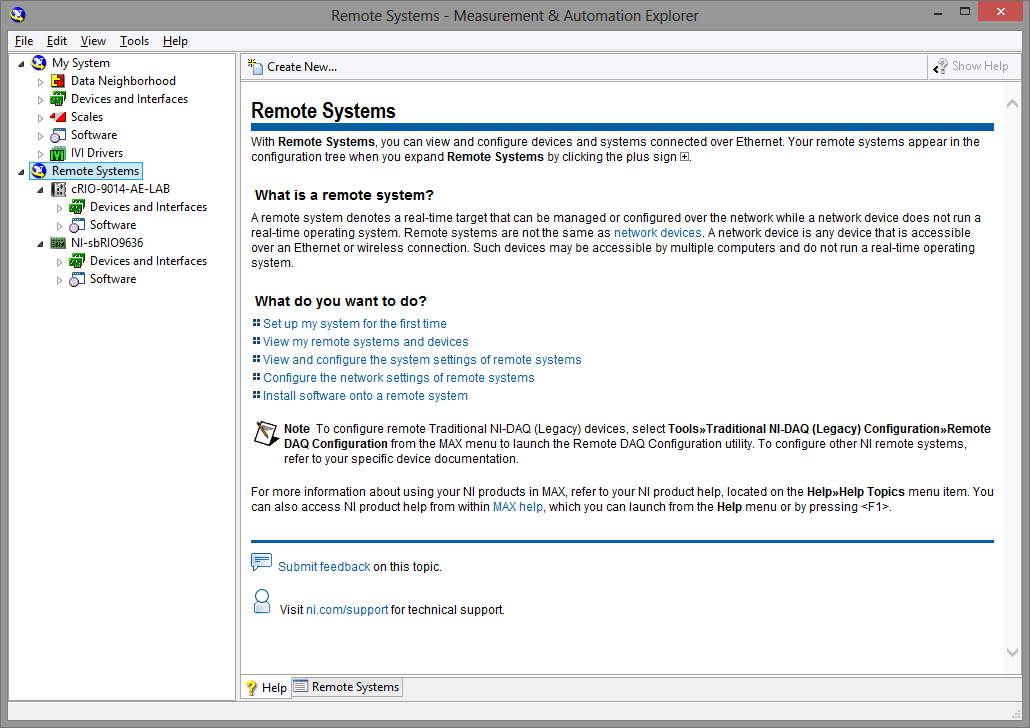
If you don't get both of them appearing you can troubleshoot the connection using Command Prompt. Once in Command Prompt confirm your computer IP settings using the command "ipconfig". If your computers IP checks out use the "ping 192.168.0.X" command to individually confirm connection to both routers and real time targets.

Real Time Targets Setup
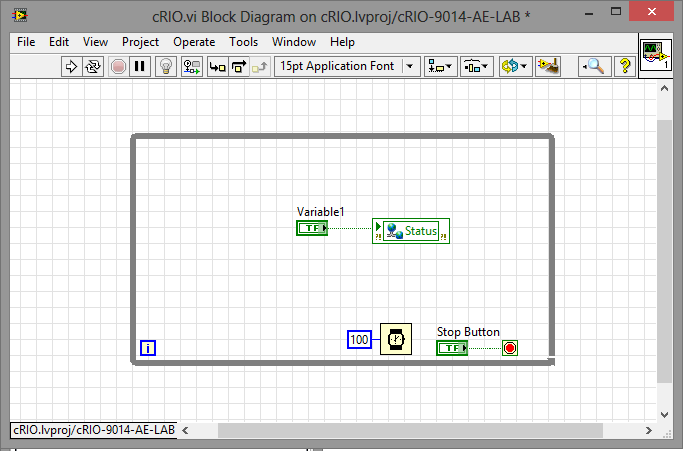
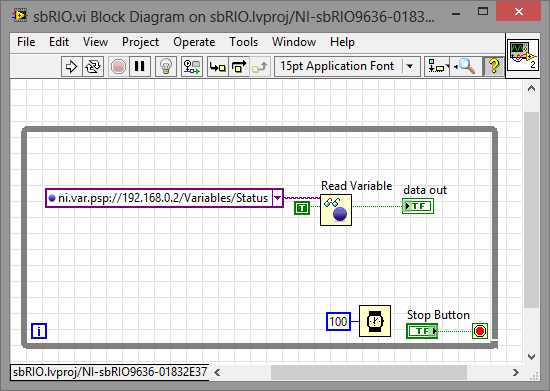
Now you need to create a small project for both the sbRIO and the cRIO, the projects I made are attached below as "RIO comms test.zip" inside this folder is two projects. The cRIO project has the variable library on it. The variable used in this example is a simple Network Published Shared Variable of a Boolean data type. Create a VI also under the cRIO target to simply write to the variable. What this VI is doing is setting the value for a network published shared variable. Using another VI running on the other real time target you can read this variable back. Instead of just writing one Boolean value this same technique can be used to write to all kinds of data types including arrays.
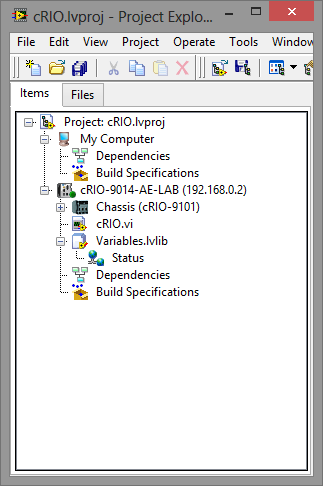
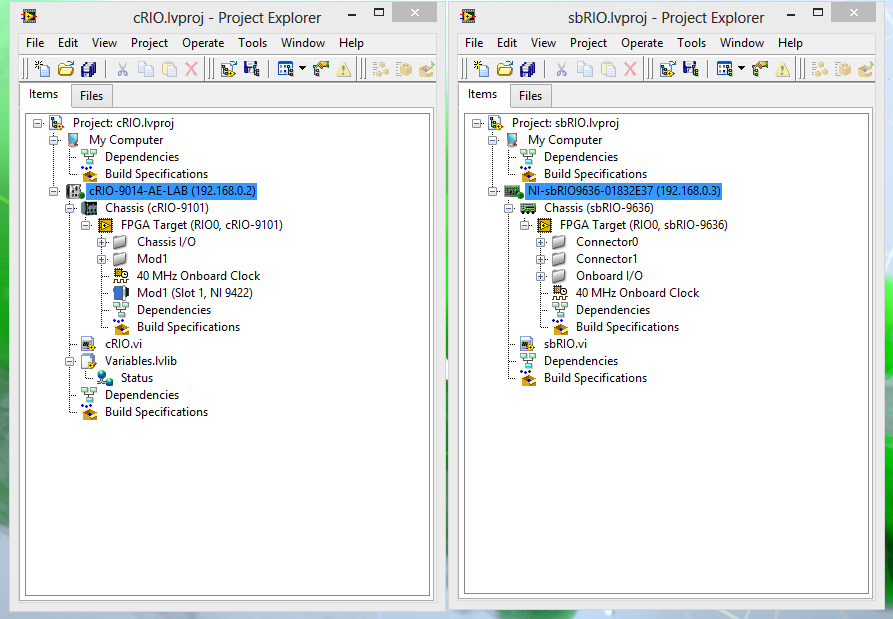
Once you have finished making the VI and the variable your project window should look like this. Ensure the variable library is under the cRIO target to ensure the variable engine will be running on the target and not on your PC.
Next setup the VI that will read the variable off the cRIO. To do this setup a project for the sbRIO and add a VI on the real time host. To read the variable back use the "Read Variable" function. Once you have dropped down the Read Variable function create a constant next to the "Shared Variable Refnum in" terminal. Then select the dropdown list and click browse.
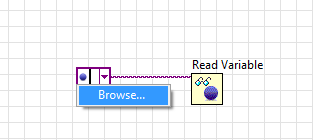
You then must navigate to the variable that is deployed on the other real time target. If the targets variable are not there you may want to deploy and run the other project so they will appear under you network. Add to the VI so that it will constantly poll of shared variable.
Both of your project files should now look like this when placed side by side.
If you open and run both of the VIs interactively you will notice as you press the button on the cRIO VI and LED on the sbRIO VI will turn on. You can simply deploy these projects using the steps found here:
http://zone.ni.com/reference/en-XX/help/370622E-01/lvrthowto/rt_setting_startup_app/
By changing the way the variables are written to and processed you can change how these two targets interact with one another. Please feel free to share the code here and make comments on it.
CLA, CPI
