- Document History
- Subscribe to RSS Feed
- Mark as New
- Mark as Read
- Bookmark
- Subscribe
- Printer Friendly Page
- Report to a Moderator
- Subscribe to RSS Feed
- Mark as New
- Mark as Read
- Bookmark
- Subscribe
- Printer Friendly Page
- Report to a Moderator
How to add a customized VI for Biosignal Logger and HRV Analyzer
Introduction
Biomedical Workbench in LabVIEW Biomedical Toolkit contains many applications for logging, analyzing biosignals. You could easily finish basic biomedical applications without any LabVIEW programming. However, how can you do when you would like to change the processing part of some apps? This article would be of help to you.
Biosignal Logger allows you to generate a virtual channel using a customized VI when logging. HRV Analyzer also allows you to add a customized VI for analysis. This article is to introduce how to add a customized VI for the two applications.
Edit template VI
The VI you added to the Biosignal Logger or HRV Analyzer must have the same connect pane with the corresponding template VIs. The template VIs are in National Instruments\Biomedical Toolkit\Workbench\data. “biosig_log_process_template.vi” is for Biosignal Logger, and “HRV Analyzer Template.vi” is for HRV Analyzer. It is recommended that you copy the template VI to another folder and edit it.
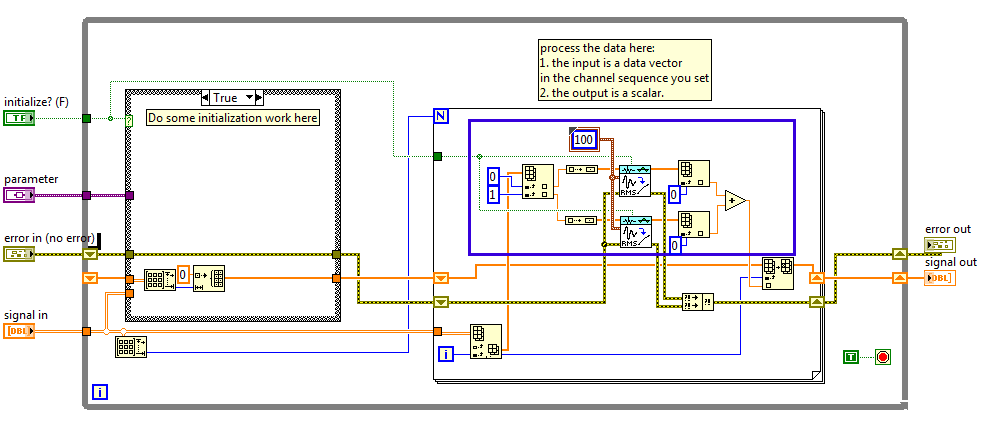
For “biosig_log_process_template.vi”, signal in is the input data vector, with each element as the current value for a channel. The array size of signal in equals the number of channels. signal out is the current value of the virtual channel after processing, which is a scalar. You should add your processing VIs in the blue box of the block diagram. If your algorithm needs some initialization work, you should do it in the “True” case of the case structure controlled by initialize?(F).
The following block diagram is an example for creating a virtual channel by adding the RMS values of two input channels. The current values for two channels are firstly indexed from the input data vector. Then the RMS values are calculated by Biosignal RMS VI. The results are then added and output.
For “HRV Analyzer Template.vi”, RR interval and Detrended RR interval are the original and detrended value of current RR intervals. Your processing VIs should be in the “False” case of the case structure.
Build source distribution
If your processing codes include non-basic LabVIEW VIs, such as VIs from Biomedical Toolkit or other toolkits, or any other customized subVIs, you need to build a source distribution to add the customized VI to Biosignal Logger or HRV Analyzer.
In the previous example for Biosignal Logger, Biosignal RMS VI in Biomedical Toolkit is used to calculate the RMS value. Thus, we need to build a source distribution by following steps:
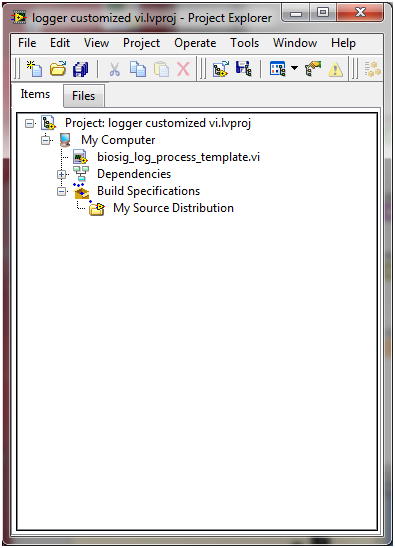
- Create a new blank project in LabVIEW, and add the customize VI to the project.
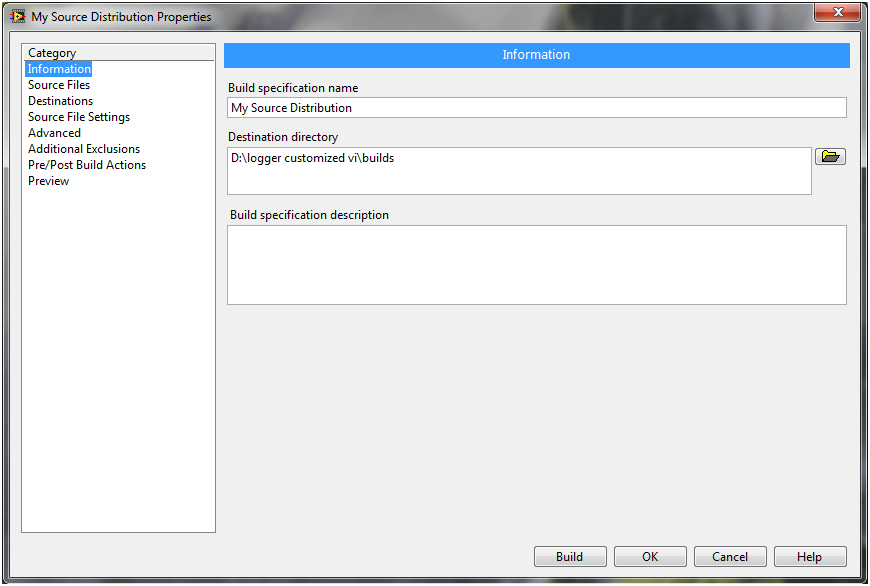
- Right click on Build Specifications and select New->Source Distribution.
- Specify a name and a directory in Information page.
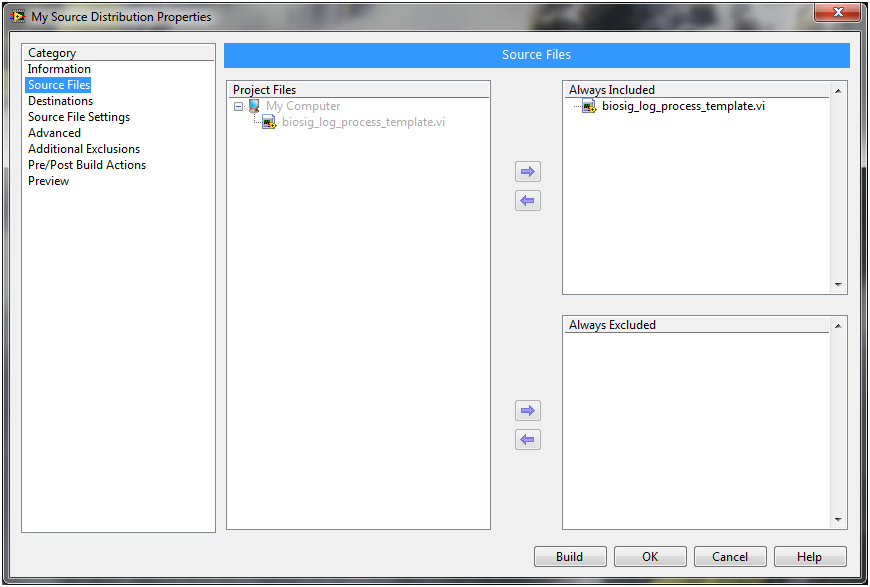
- In Source Files page, add the VI you created to Always Included.
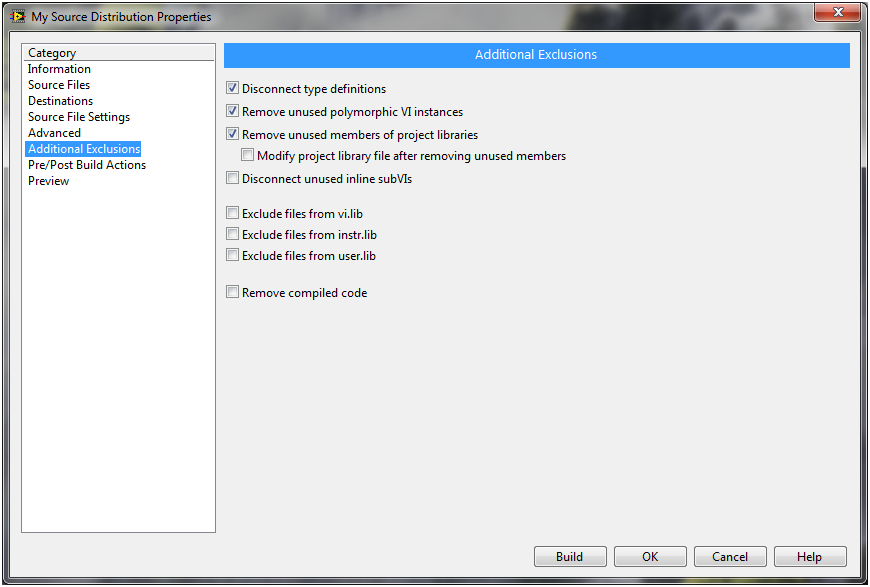
- In Additional Exclusions page, check Disconnect type definitions, Remove unused polymorphic VI instances, and Remove unused members of project libraries. Uncheck Exclude files from vi.lib, Exclude files from instr.lib, and Exclude files from user.lib.
- Click Build and wait until build completes. You will find your customized VI under the directory you specified in step 3.
Add customized VI
For Biosignal Logger, complete the following steps to add a customized VI:
- Launch Biosignal Logger and Player and click Logger Settings.
- Configure physical channels and click Next.
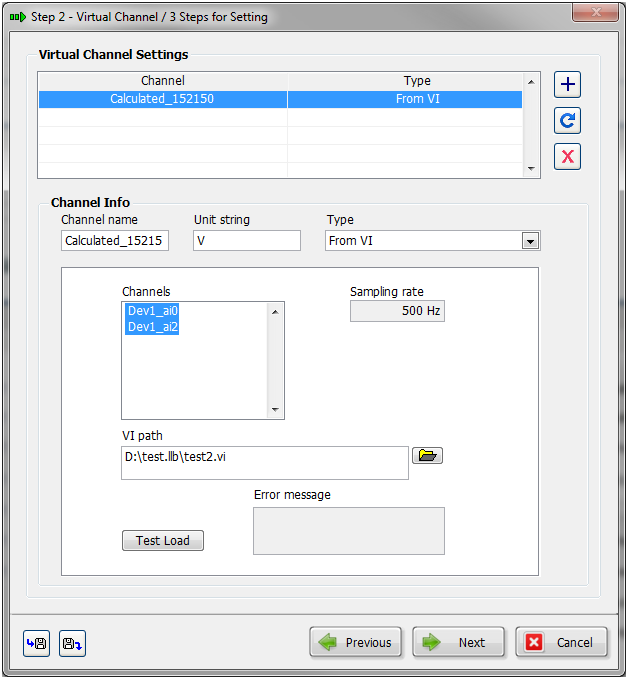
- In Virtual Channel Settings page, select From VI in Type.
- In VI path input, browse and select the processing VI. If you have built a source distribution, please select the VI in the build directory, not the VI in the project.
- Click Test Load to assure that this VI is valid.
- Select the channels you want to input to the processing VI in Channels.
- Click “+” button to add this virtual channel to list.
- Click Next button and complete the following configuration.
For HRV Analyzer, complete the following steps to add a customized VI:
- Launch HRV Analyzer.
- Select User-defined in Select Analysis.
- Click Analysis Settings and select the analysis VI. If you have built a source distribution, please select the VI in the build directory, not the VI in the project.
