- Document History
- Subscribe to RSS Feed
- Mark as New
- Mark as Read
- Bookmark
- Subscribe
- Printer Friendly Page
- Report to a Moderator
- Subscribe to RSS Feed
- Mark as New
- Mark as Read
- Bookmark
- Subscribe
- Printer Friendly Page
- Report to a Moderator
Tutorial: License a LabVIEW Library Using Standard Mode
Exercise 1: Set Up
Goal
The remainder of the exercises in this hands-on require LabVIEW 2010 or later, LabVIEW Third Party Licensing & Activation Toolkit 2011, and the Simple Math Add-on (or any other collection of VIs in a LabVIEW Project Library). This exercise ensures that the hands-on computer is set up correctly for the remainder of the exercises.
Prerequisites
-
LabVIEW 2010 or later
-
LabVIEW Third Party Licensing & Activation Toolkit 2011 or later.
-
Simple Math Example Toolkit
Part 1: Verify LabVIEW and Third Party Licensing & Activation Toolkit Installation
- Ensure that LabVIEW 2010 or later is installed on the system
- Navigate to Start > All Programs > National Instruments > LabVIEW 201x (32-bit) > LabVIEW (32-bit)

- If LabVIEW is not installed, you can download the latest version of LabVIEW from http://www.ni.com/labview/.
- Navigate to Start > All Programs > National Instruments > LabVIEW 201x (32-bit) > LabVIEW (32-bit)
- Ensure that LabVIEW Third Party Licensing & Activation Toolkit 2011 is installed on the system
- From LabVIEW click Tools > Add-on Licensing Tool
- If this menu entry does not exist, LabVIEW Third Party Licensing & Activation Toolkit is not installed. It can be downloaded from the Third Party Licensing & Activation Toolkit community group at ni.com/licensingtoolkit.
Part 2: Review The Simple Math Add-on
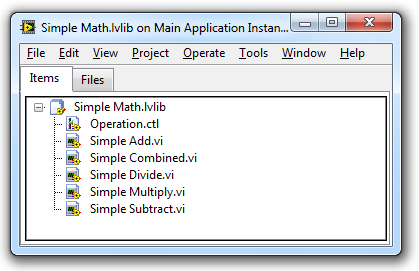
The Simple Math Add-on is a very simple example toolkit that we will use to demonstrate licensing and activation in LabVIEW. It consists of 5 VIs, a LabVIEW Project Library and some supporting files that will be used later in the hands-on. This library should have been included with this document.
- Browse to the Simple Math folder in C:\Hands On\Simple Math\ and open Simple Math.lvlib.
- Review the VIs in this library to get familiar with the add-on you will be licensing in the next exercises
Exercise 2: License A Library
Goal
The goal of this exercise is to quickly license a library of VIs and to create a 30-day evaluation of the software. This requires an account on the NI SOLO server, which is the server used for creating the license file and activating already licensed software.
Prerequisites
-
LabVIEW 2010 or later
-
LabVIEW Third Party Licensing & Activation Toolkit 2011 or later.
-
Simple Math Example Toolkit or any library of VIs to be licensed
-
Internet Connection
Part 1: Sign Up and Log In to SOLO Server
-
Start LabVIEW and Open the Add-On Licensing Tool
-
This can be accessed in LabVIEW by clicking Tools > Add-on Licensing Tool
-
-
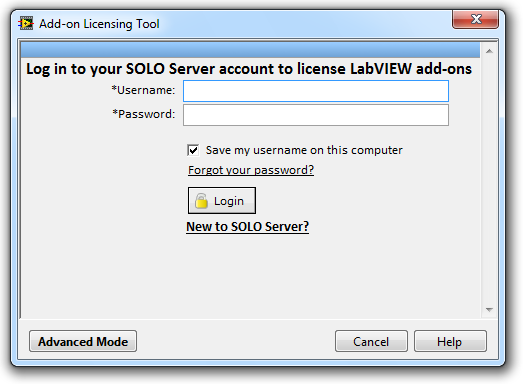
The Add-on licensing tool should appear as in Figure 2-1. If it does not, click on the “Standard Mode” button.
-
If you do not already have a NI SOLO Server account, you will need to sign up for a free test account before continuing
-
Click “New to SOLO Server?”
-
Click “Sign up for an account today!”
-
Fill out the required information and click “Sign Up Now!”
-
After a few minutes you should receive an email with your Username which you will use to log into the SOLO Server
-
-
Once you have a NI SOLO Server account, log in to the Add-on Licensing Tool with your Username and Password
Part 2: Define Add-on
Once logged into the Add-on Licensing Tool, you must create a product definition in the SOLO Server. This product definition defines how the product will appear in LabVIEW for activation and evaluation, which we will see in exercise 3.
- After logging in, you will see the Licensing Home screen. Click on “Define a new add-on to license”
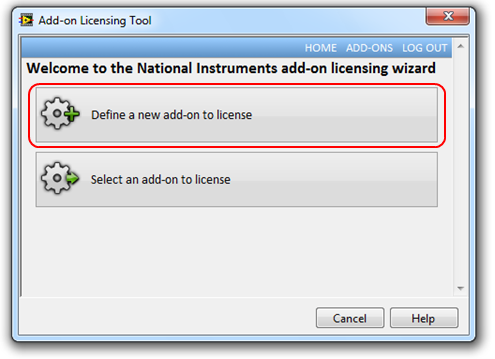
- Note: If you have already defined an add-on, you can select it by choosing “Select an add-on to license”, selecting the correct add-on and skip to Part 3
- In the Add-on definition page, enter the Add-on Name, Description, version and password and click “Submit”
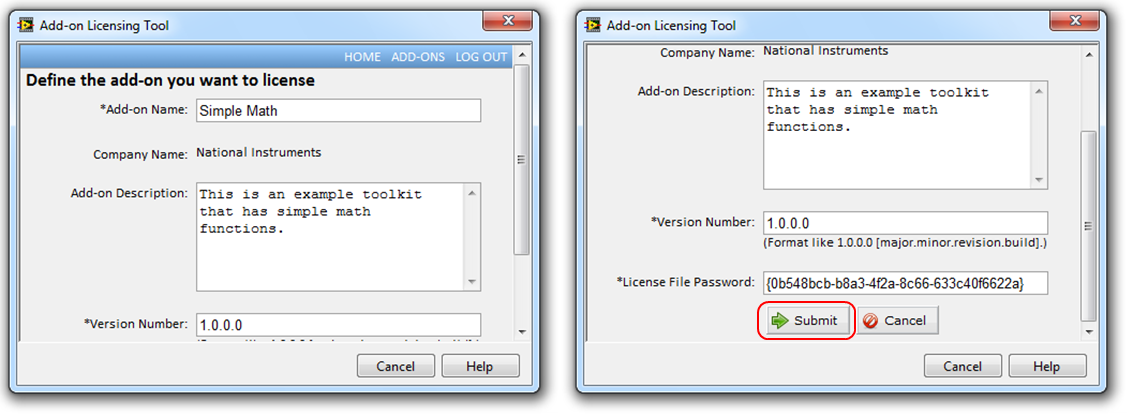
- Note: You can use the automatically generated secure password, or create your own password for the license file, but make sure that you note this password for later. You will need it to re-license a toolkit if you make any changes.
- If you need to make changes to the product details, click “Edit”. Otherwise, click “Next” to license a library.

Part 3: License Library
The final step in the process is to apply the licensing to the Toolkit’s project library (lvlib). This will create a new “licensed” copy of the toolkit and create the license file that defines how the toolkit should behave. We will see this behavior in the next exercise.
- After defining the add-on, you will see the licensing page of the tool. The Product Name, Product Version and Company Name should all be populated with the information from Part 2.

- Choose the project library of the add-on that you want to register in the “Select library file” path control.
- Choose where the licensed copy of the add-on will be stored on disk in the “Select output directory” path control.
- Note: This is automatically populated to a subdirectory of the current library file called “licensed” however this can be changed to any location. If you choose the same directory as the current library file, your original source will be overwritten with the licensed copy.
- Click “Finish” to add licensing to the library and create the license file.
- Note: If the directory selected in “Select output directory” does not exist, you will be asked if you want to create it. Click yes on this dialog to proceed.

- Note: If the directory selected in “Select output directory” does not exist, you will be asked if you want to create it. Click yes on this dialog to proceed.
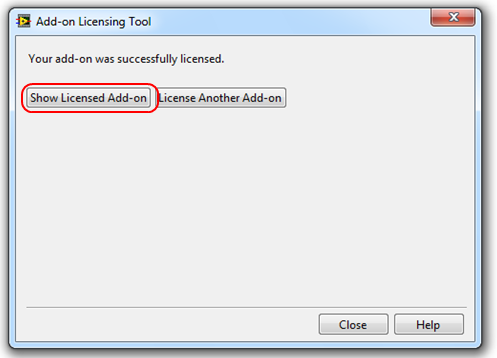
- On the final page of the tool, click “Show Licensed Add-on” to open the directory where the new licensed add-on was stored.
- Notice that the directory contains only the VIs and Controls that were listed in the lvlib, as well as the newly created license file. You will have to manually copy over any additional un-licensed files that were originally in the directory. In this Simple Math Example this includes the following directories: _EULA, _Examples, _Help, _Licensing, and _Tools Menu
- Return to the Add-on Licensing Tool and click Close to complete the exercise
Exercise 3: Test Evaluation Add-on
Goal
The Goal of exercise 3 is to test the licensing functionality on the add-on that was created in Exercise 2. This is not part of the development cycle, but a demonstration of how a customer would use your newly licensed product. You will see how the add-on works as a 30-day evaluation as well as an expired add-on. Note: The Third Party Licensing & Activation Toolkit is not required to activate a licensed library. The users of your library will only need LabVIEW 2010 or later to install this toolkit.
Prerequisites
-
LabVIEW 2010 or later
-
Simple Math Example Toolkit or any library of already licensed VIs
Part 1: Test Add-on in Evaluation Mode
After an add-on is registered with LabVIEW, it will start off in evaluation mode. Registering an add-on is simple. It is automatically done when you run the Add-on Licensing Tool on a library (exercise 2) or whenever a licensed library is opened in LabVIEW. Installing a licensed add-on with VI Package Manager also will register the add-on with LabVIEW on the computer it is installed on. Information on this can be found in the “Build a LabVIEW Add-on with VIPM” Hands-on tutorial.
However due to security restrictions in Windows Vista and later, automatic registration may not always work since it needs to have access to the Windows Registry. Because of this, it is important to register an add-on manually using the RegisterAddon tool.
- Register the add-on with LabVIEW. To correctly register an add-on with the computer you must call RegisterAddon.exe which is installed with each version of LabVIEW. You may call this from the command line or from a VI using the System Exec VI. Note: Since registering an add-on with LabVIEW modifies the Windows Registry, you must have administrative privileges in order to complete the following steps.
- Method 1: Using Windows Command Line
- Click Start > Run, type ‘cmd’ and press enter or type ‘cmd’ in the Start Menu search bar and press enter.
- Navigate to <LabVIEW>\resource\Partners
- Type the command “RegisterAddon.exe -- -s -l "..\..\Hands-On\Simple Math\licensed\Simple Math.lvlib"
- See Notes below
- Method 2: Using the System Exec VI
- Create a new VI and save it to <LabVIEW>\resource\Partners
- Place the System Exec VI and create a string constant on the “Command Line” input.
- Enter the text “RegisterAddon.exe -- -s -l "..\..\Hands-On\Simple Math\licensed\Simple Math.lvlib" (without quotes) into the string constant.
- See Notes below
- Save and run the VI.
- Notes
- The argument in the quotes is the location of the lvlib relative to the <LabVIEW> directory.
- For troubleshooting, you may add the –d argument before –l to generate a log file. This log file will be written to <LabVIEW>\resource\Partners\default.log
- Method 1: Using Windows Command Line
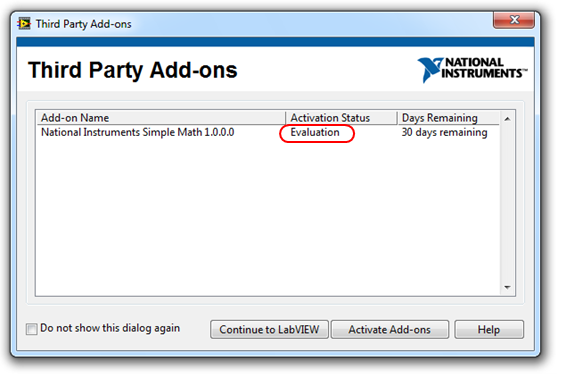
- When LabVIEW starts up, you will see a dialog explaining that you have evaluation software installed. We will attempt activation later, but for now click “Continue to LabVIEW.”
- Open a new VI and place one of the licensed VIs on the block diagram. Notice that you can program and run this VI like any other VI.
- Try to open the block diagram of the licensed VIs. Notice that you cannot view the source code of licensed VIs, even if their Block Diagram is not password protected.
Part 2: Test Expired Add-on
Next we will learn how a licensed add-on behaves after its evaluation period has ended.
- Close LabVIEW
- Change your computer’s system clock forward at least 31 days. This will make LabVIEW think that the evaluation date has passed.
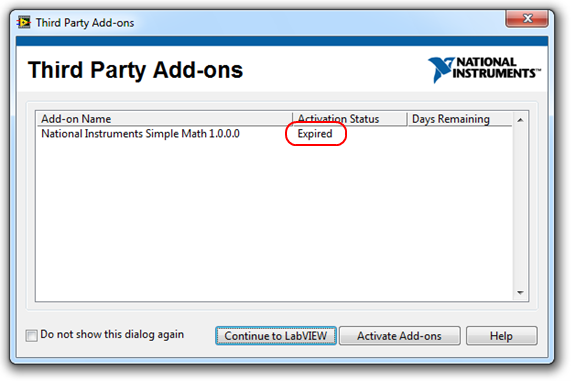
- Start LabVIEW. The Activation dialog will appear again, this time with an “Expired” Activation Status.
- Click “Continue to LabVIEW”
- Open a new VI and place one of the licensed VIs on the block diagram.
- Click the broken Run Arrow
- Notice that the VI is broken because the add-on is not properly licensed.

Part 3: Try to Trick the System
The next thing we want to do is ensure that the licensing scheme cannot be tricked. Since we have seen that the licensing involves the system date, why can’t we just turn the clock back to a time when the license is valid? Let’s find out.
- Close LabVIEW
- Turn the system clock back to the current date, when the add-on was in evaluation mode.
- Start LabVIEW. The Activation dialog will appear again, this time with an “Invalid” Activation Status.

- Click “Continue to LabVIEW”
- Open a new VI and place one of the licensed VIs on the block diagram.
- Click the broken Run Arrow
- Notice that the VI is still broken because the add-on is not properly licensed. Whenever the licensed toolkit is accessed, the licensing system records the last used date/time. It can then determine if the system has been tampered with by comparing the current time with the previously recorded time.
Exercise 4: Activate and Test Licensed Add-On
Goal
After the customer evaluates the product, they will hopefully want to purchase a full version if it fits their needs. This exercise will show how to create a license for them with the SOLO server, the process required to activate the add-on, and testing to ensure the activation was successful.
Prerequisites
-
LabVIEW 2010 or later
-
Simple Math Example Toolkit or any library of licensed VIs.
-
Internet Connection
Part 1: Create a License ID in SOLO Server
Part 1 is a required step for the Developer of the software once a customer purchases the software. In this step we will create a customer in the SOLO Server and create a license that is linked to the customer. This License contains a License ID and Password which must be sent to the customer in order for them to activate their software.
- Log into the NI SOLO Server at https://softwarekey.ni.com/solo/authors/ with the Login ID and Password that you created in Exercise 2.

- Create a new test customer in the SOLO database
- On the toolbar choose Customers > Add Single
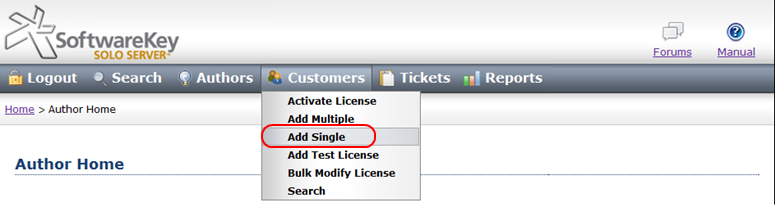
- Fill in the information for your new customer and click Submit. Only the password, Company, First and Last name are required, other options are optional.
- On the toolbar choose Customers > Add Single
- Add a License to the Customer profile
- Note: More advanced options are available such as linking licenses to invoices, but for this exercise we will only create a license without an order.
- From the Customer Information page, click “Add License”

- Choose the product you created in Exercise 2 and click “Test License”
- Note: Trial SOLO Accounts can only create test licenses which will be removed from the system at the end of the month. If you have a full SOLO account you can create permanent licenses by clicking “Prepaid License”. Test licenses should only be used for development and testing, and never distributed to actual customers.
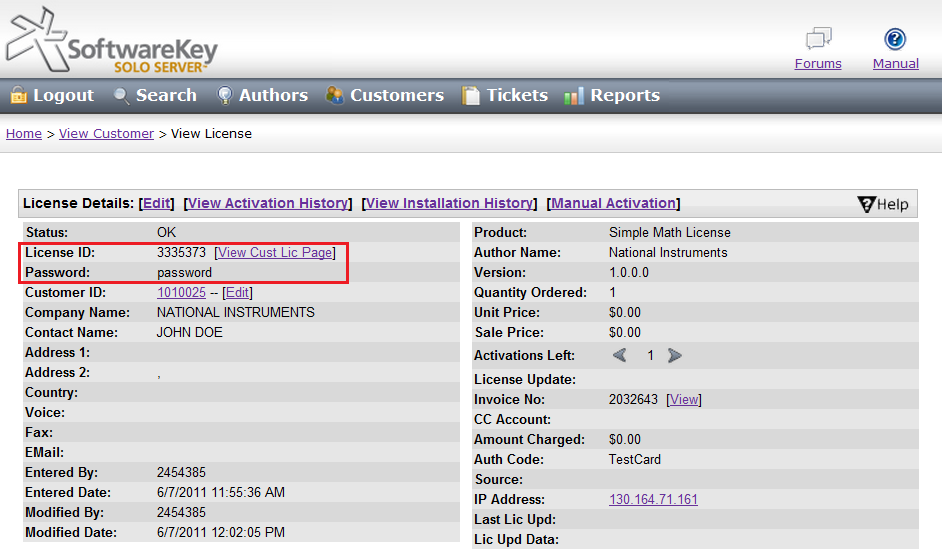
- The next page shows the License Details and allows you to configure how many times a user is allowed to activate with it. From this page the most important information is the License ID and password. You will give this information to the customer in order to activate the licenses, as well as in Part 2 of this exercise.
Note: In the SOLO server interface you can do many other things such as re-configure existing licenses, set up invoices for payment, etc. For more information on all the features of the SOLO server, please see http://support.softwarekey.com/.
Part 2: Deactivate Add-on
After creating a license, a deactivation option can be added.
- Log in into your SOLO account and go to Configure>>>Products>>>Options and choose the product, which you want to have a deactivation.
- Scroll to the bottom of the page and click on the appropriate license.
- In the opened page choose Actions>> Edit from View Product Option:
-
Scroll to Product Activation and Licensing Details: section and check the Allow Deactivations check box for enabling deactivation option.
Note: Deactivations per U/M: allows to deactivate the add-on on the same machine exactly as many times as it is entered in the field. -1 allows unlimited deactivations.


Part 3: Activate Add-on
Once a license is created for a customer, the last step is for them to activate the product with the license that they have purchased.
- In LabVIEW Choose Help > Activate Add-ons to open the Third Party Add-on Activation Wizard.
- Alternately, you can get to this from the Third Party Add-ons pop-up window when LabVIEW starts. Simply click Activate Add-ons to get to this window

- Alternately, you can get to this from the Third Party Add-ons pop-up window when LabVIEW starts. Simply click Activate Add-ons to get to this window
- Click on the Add-on you want to activate and click “Next”.
- Ensure “Automatically activate through an Internet connection” is selected and click Next
- Note: if your computer does not have internet access, you can select “Use a Web browser on this or another computer to acquire an activation code” and follow the instructions on the following page.
- Enter the License ID and Password from the SOLO Server License details (see Part 1 Step 4) and click “Activate”.
- If the license ID and password was correct, the add-on will be successfully activated. Click Finish and restart LabVIEW in order to finalize the activation.
Part 4: Test Licensed Add-on
- Start LabVIEW. You will notice that no pop-up should occur on startup telling you have an unlicensed add-on.
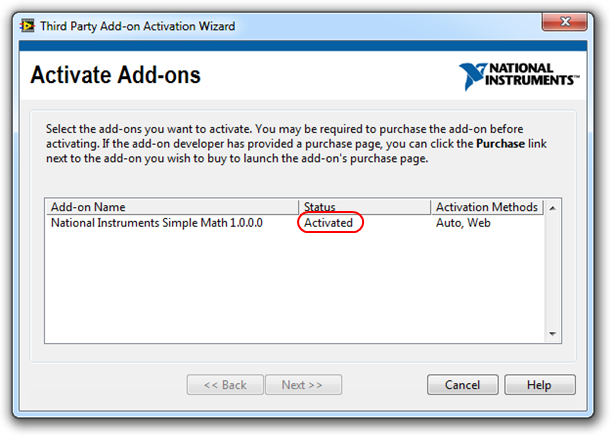
- Choose Help > Activate Add-ons to open the Activation Wizard
- Note that the Status for the Simple Math Add-on should be “Activated”
- Open a new VI and place one of the licensed VIs on the block diagram. Notice how you can again program and run this VI like any other VI.
- Open the block diagram of the licensed VI. Notice that you can view the source code now that the VI is activated.
- Note: You can only view the block diagram of activated VIs that are not password protected. If you want to lock the block diagram of any VI, open the VI Properties and select the Protection category.
- Note: You can only view the block diagram of activated VIs that are not password protected. If you want to lock the block diagram of any VI, open the VI Properties and select the Protection category.
Part 4: Deactivate Add-on
The are some cases, when deactivation is required. For deactivating the add-on follow the steps below:
- Start LabVIEW.
- Go to Help > Activate Add-ons to open the Activation Wizard. Choose the add-on, that you like to deactivate and click Next.
- Choose the appropriate method for you to deactivate the add-on and click Next.
After successful implementation of these steps the add-on should be deactivated.

Exercise 5: Create an Installer for the Licensed Add-on
Goal
The Goal of exercise 5 is to create a package for distributing the licensed add-on. There are many methods in which a developer can distribute software, but the most prevalent for LabVIEW add-ons is VI Package Manager (VIPM).
Prerequisites
- LabVIEW 2010 or later
- LabVIEW Third Party Licensing & Activation Toolkit 2011 or later.
- VI Package Manager (For option 1)
- Simple Math Example Toolkit or any library of VIs to be licensed
- Internet Connection
The recommended installer for a LabVIEW Add-on is VI Package Manager from JKI. Step by step instructions for creating a package for your add-on can be found in the Add-on Dev Center document entitled How to Build a LabVIEW Add-on with VI Package Manager.
NOTE: In order to build a licensed library into a package, the library must be fully activated on the build computer. With VIPM Professional or Enterprise edition, you can license an unlicensed library at build time. However, in this tutorial we discuss how to build an already licensed library into a package with the free Community edition of VIPM. For more information on the professional edition features, please see the VIPM Documentation.
- Create a package build specification for your add-on as described in the above document but do not build the package yet.
- Make sure you use the new “licensed” directory as the source directory in VI Package Builder
- E.g. C:\Hands-On\Simple Math\licensed
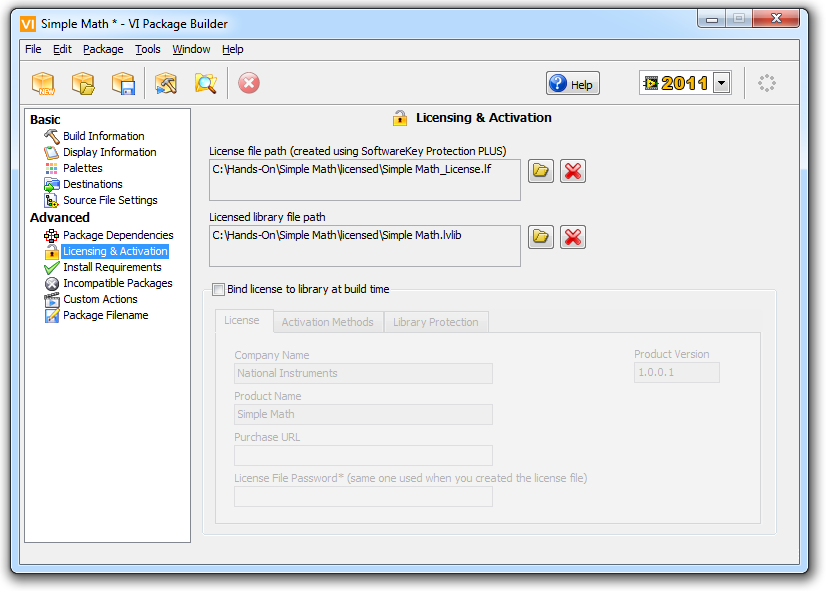
- Make sure that the Company Name used in the Add-on Licensing Tool EXACTLY matches the Company Name in VI Package Builder. This is required in order for licensing to work correctly.
- On the Licensing & Activation page, choose the license file path and Licensed library file path that were created in exercise 2.
- Click the Build button to begin the VIPM build.
- Note: If you get error 1507 during build, it means that the add-on was in an evaluation or invalid state on the build computer. To resolve this, you must first activate the add-on in LabVIEW before building your package.
- The resulting VI Package can now be installed on another computer with a 30 day trial.
Conclusion
This hands-on covers licensing a NI Toolkit using Standard Mode. If you need more advanced licensing functionality, you can also utilize the advanced mode of the Add-on licensing tool as well as the Third Party Licensing & Activation Toolkit API. More information on these topics can be found on the Third Party Licensing & Activation Toolkit community portal (ni.com/licensingtoolkit). For additional questions, you can also contact the NI Tools Network team at toolsnetwork@ni.com.
Additional Resources
- Choosing the Correct Licensing Method in LabVIEW Third Party Licensing & Activation Toolkit
- LabVIEW Help: Licensing a Development Add-on
- FAQ: Test Accounts for Standard Mode
- Tutorial: License a LabVIEW Library Using Advanced Mode
- Tutorial: License a LabVIEW Executable Using SoftwareKey Instant PLUS
- Add Licensing Checks to an Application's Source Co
