From 04:00 PM CDT – 08:00 PM CDT (09:00 PM UTC – 01:00 AM UTC) Tuesday, April 16, ni.com will undergo system upgrades that may result in temporary service interruption.
We appreciate your patience as we improve our online experience.
From 04:00 PM CDT – 08:00 PM CDT (09:00 PM UTC – 01:00 AM UTC) Tuesday, April 16, ni.com will undergo system upgrades that may result in temporary service interruption.
We appreciate your patience as we improve our online experience.
Description:
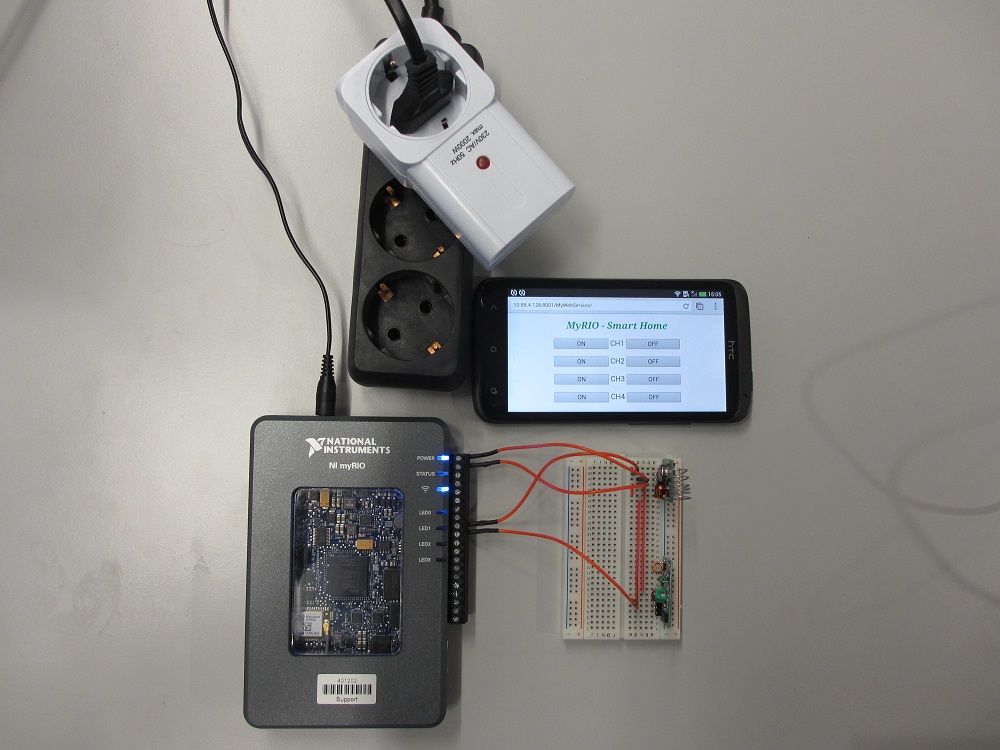
This document shows step by step how to implement a remote control of a socket-outlet:
1. Implementing Transmitter and Receiver
2. Logging Signal of remote control
3. Transmitting Signal
4. Implementation of Web Services
5. Web Services with CSS
6. Outlook
Introduction:
A RF (radiofrequency) receiver/transmitter could be used to control different devices remotely. This example could be expanded on many other devices. So if you implement your own ideas fill free to upload them. The restriction in this project is that the transmitted code must be an hard-coded one.
Please note that different frequencies are used because of national and international regulations governing the use of radio for communication.
1. Implementing Transmitter and Receiver
First we want to make sure that the receiver and transmitter are working and connected correctly.
To extant the range of your transmitter you need an antenna deepening on your used frequency (If it isn´t there already).
Typically a λ/4 antenna rolled to a spiral is used:

To avoid that the transmitter is sending noise signals which could interfere with other RF devices, we are connecting the transmitter and receiver to Connecter C (The DIOs are connected to a pull down resistor).
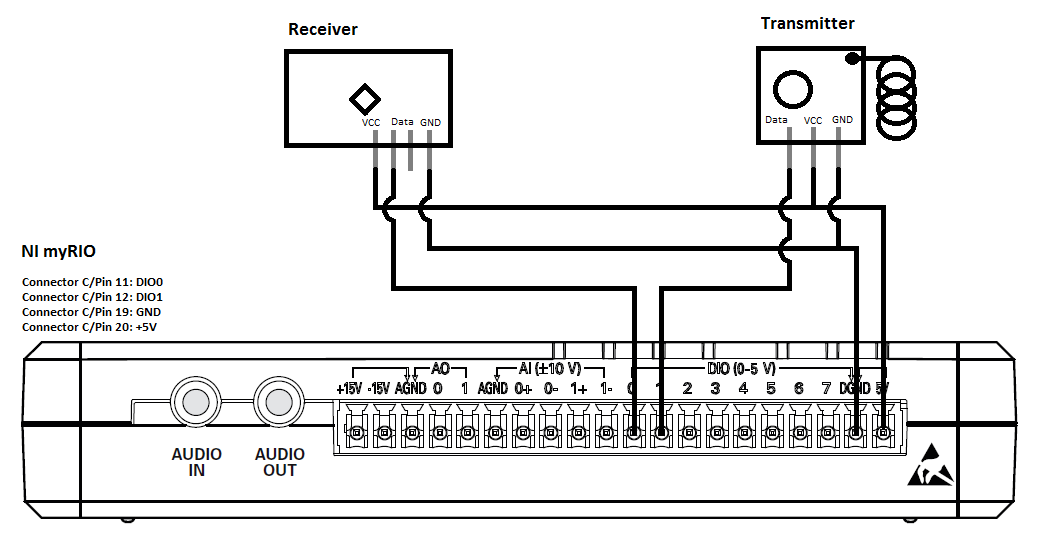
The program is sending and receiving a flashlight. In my Case the transmitter or receiver modules couldn´t hold a high signal longer than 300 ms (so don´t be confused).
2. Logging Signal of remote control
If the communication is working we could start to decode the physical transmitter. For that purpose we log the send signal and analyze it.
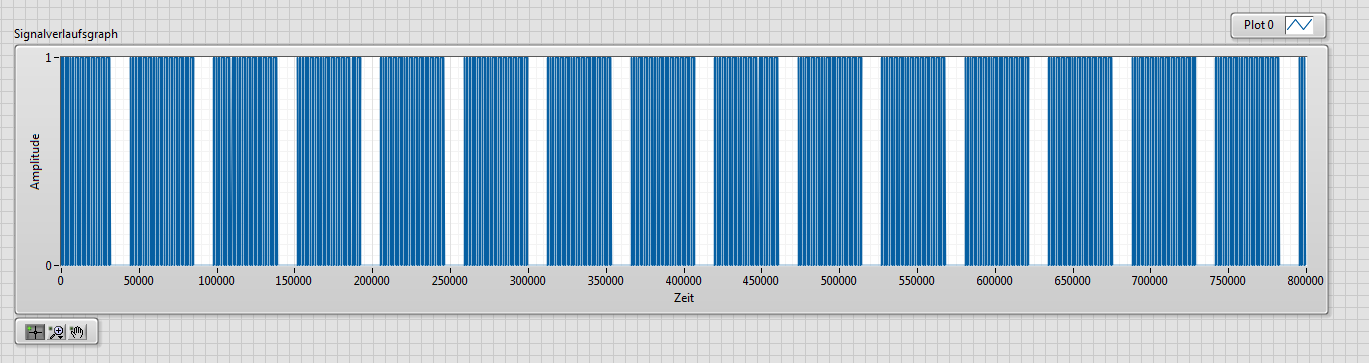
Example of how the Signal of the remote control could look like.
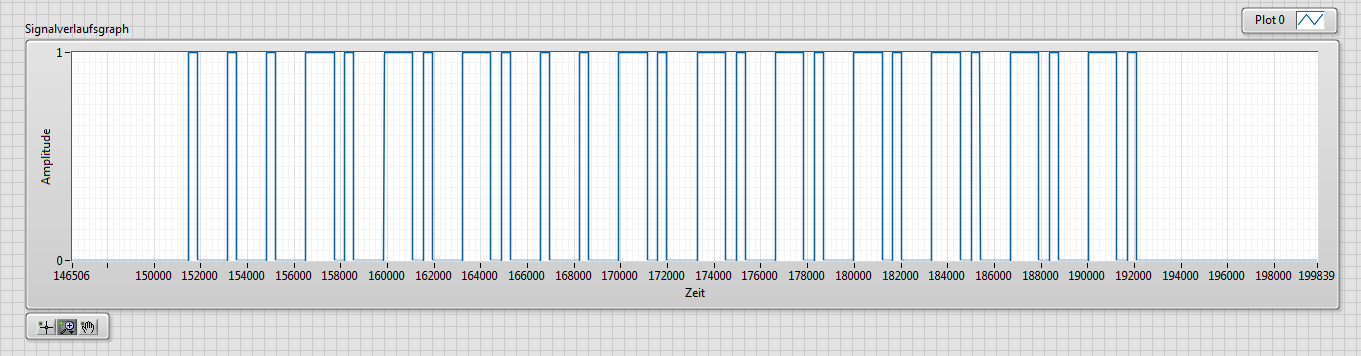
Zoom in one burst:
- A long “1” means high
- A short “1” means low
- Furthermore the need the breaks (“0”) between them and between each burst
3. Transmitting Signal
Now, after you know the structure of your Code, you can modify the VI´s to transmit the Signal with the myRIO. Most likely you need to change the bit pattern in the “[RT] Button.vi”.
You should now be able to switch on and off the radio controlled sockets.
4. Implementation of Web Services
The idea now is to use a web browser to communicate with the VI instead of the front panel. Which means that the created layout is platform independent. For that purpose I am using the Web Services of LabVIEW. You might need to install the required software on the myRIO (NI Application Web Server).
(Alternatively you could also implement the communication with “Data Dashboard”, which is currently only working on tablets)
In this project I created the layout with an “Online HTML Editor” and implemented the communication between the web browser and the “[RT] Button.vi”
WiFi connection: (The project IP is most probably to be changed)
5. Web Services with CSS
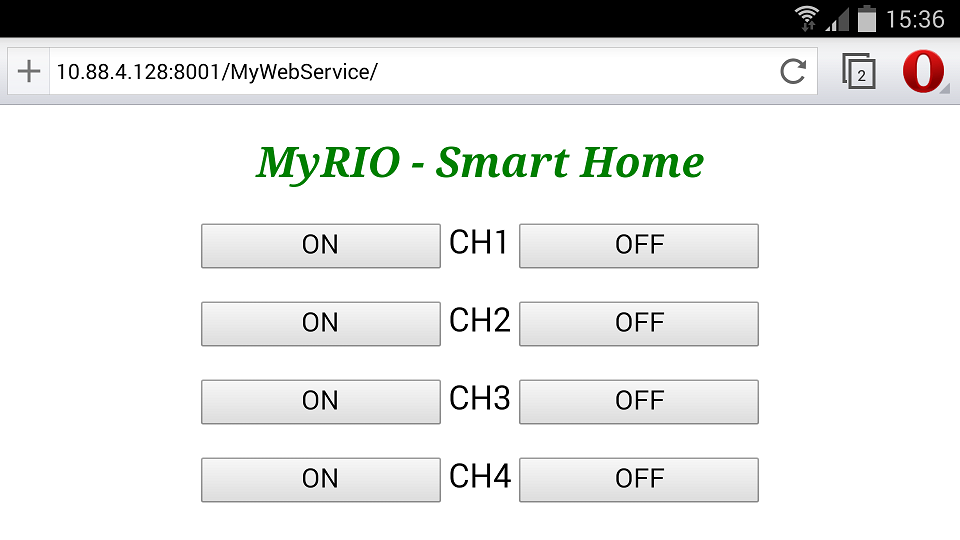
If the communication is working the next step would be to change the layout. Maybe you tried the html page already on your smartphone? If you did, you most likely encountered difficulties with the zoom or the portrait and landscape mode. Therefore I outsourced the style commands in extra .css data and call the one which should be used for the current modus. Unfortunately I could only test the Code with two smartphones. I it is very likely that you might need to change the layout a little bit if you are using a different resolution or a tablet (which might also need a new .css data)
6. Outlook
I think there is a lot of potential here, especially if you want to implement some “Smart Home” features.
- You will find to download a VI which is calling the current weather data
- You can send yourself an email
- You can use sensors (temperature , humidity, light, motion…) to trigger events
- You can Control a Motor
- You can Use a Webcam
- You might implement more RF communication (e.g. water alarm, light control) or infrared communication
- … If you have more Ideas please write them in the comments
Why the'reset myRIO.vi' cannot be load in my Labview?
Hi,
it might be, what you aren´t using the myRIO 2014 toolkit. If that is the case you can download it here: http://www.ni.com/download/labview-myrio-toolkit-2014/4854/en/
If not, please contact the technical support.
Thank you! I have solved this problem.
But I meet another mistake,it says 'digital output':the current personality or NI myRIO target does not support the channels.
How can I solve it?
Thank you! I have solved this problem.
But I meet another mistake,it says 'digital output':the current personality or NI myRIO target does not support the channels.
How can I solve it?
Hi haleyshi
I don´t know your answer. But if you ask your question in the official forum more people are able to help you and they might solve this problem. http://forums.ni.com/
Also as mentioned above, you can contact the technical support if you are an student, have bought a product in the last year or have a contract with NI.
Greetings Kilian
P.s. Here are some information about the personalities, but I couldn´t see why they should cause any problems. http://zone.ni.com/reference/en-XX/help/373925B-01/myriohelp/myrio_fpga_personalities/
Does NI myRIO need networking?
Well, yes and no. The NI myRIO don´t need networking. But to run the Smart Home projects you will. There are two options. The first one ist to connect your myRIO to your existing network in your house, the advantage would be that you have still internet. The second one is that the myRIO is building its own network (good for testing).
Some links that might help you.
Connecting NI myRIO to a Host Computer (myRIO Module)
http://zone.ni.com/reference/en-XX/help/373925A-01/myriohelp/myrio_usb_wifi_config/
Creating Wireless Networks Using NI myRIO (myRIO Toolkit)
http://zone.ni.com/reference/en-XX/help/373925B-01/myriohelp/myrio_creating_wireless_networks/
Install Software with NI Max:
https://wikis.web.cern.ch/wikis/display/EN/Install+software+on+the+myRIO
