From Friday, April 19th (11:00 PM CDT) through Saturday, April 20th (2:00 PM CDT), 2024, ni.com will undergo system upgrades that may result in temporary service interruption.
We appreciate your patience as we improve our online experience.
From Friday, April 19th (11:00 PM CDT) through Saturday, April 20th (2:00 PM CDT), 2024, ni.com will undergo system upgrades that may result in temporary service interruption.
We appreciate your patience as we improve our online experience.
Often as I open new software and the user interface pops up, I make a few typical clicks around, and I can almost immediately recognize it as a LabVIEW application. It’s funny how as a LabVIEW developer, I can recognize just from a user interface alone and some minor interaction that it has been written in LabVIEW. In the past, I found this true with other development platforms; although this is no longer as obvious. So, what is one of the things that made me suspicious of it being written in LabVIEW besides my familiarity with the common controls/indicators?
The screen would not resize.
It seems that generally speaking there is an opinion that in LabVIEW it just isn’t easy or worthwhile to design a nicely laid out, resizable UI. There aren’t very many good examples or documentation available, but it is really quite simple to accomplish. Resizable UI’s give a great feel to clients and give your software added professionalism at very little cost to developers. There is one caveat to this though, it should be considered up front at design time. Completing software without this in mind and trying to convert a UI to become resizable is typically a nightmare and should be avoided when possible. This is most especially true with complex UIs.
So, how is it done?
(After reading this please check out my follow up blog: Advanced Resizable UIs: Multicolumn Listboxes)
The most important step in making a UI resizable is some up front planning. Typically, we do some mock ups of how we anticipate the user interface to look and feel. This is a good time to plan which aspects you want to resize, and which you do not.
Elements you wish to resize or not resize should be grouped into sections.
In a LabVIEW application, the following elements typically should resize:
The following elements generally should not resize:
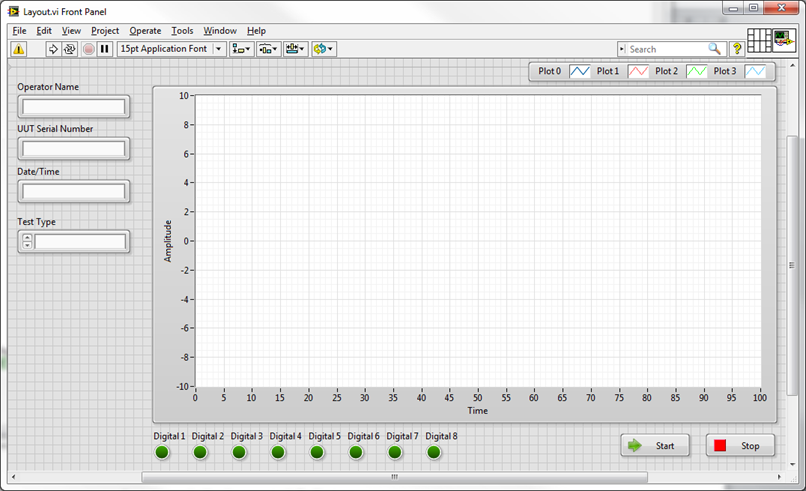
Keep in mind these are just general recommendations, not rules. See the image below for my sample layout. Notice I have grouped elements such as text inputs, Boolean indicators, and buttons which I do not want to change size.
In this example, the only element I want to scale as the UI resizes is the graph.
Now it’s time to add one of the more underutilized elements on the front panel palette – splitters. These can be found under the “Containers” palette in both Modern and System sections. Adding a splitter to your VI will create a hierarchy of “Panes” on your front panel. Each pane can be considered a section of your front panel that can have separate resizing settings from the rest of the UI.
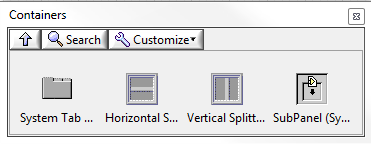
There are horizontal and vertical splitters, and which you choose first is more important than you might think. It depends on your intended layout, but using my example it is obvious we want all of my text inputs to stay on the left as well I may want to leave some room below for future additions. As well, I want to keep my digital indicators in line with the left side of the graph. In order to keep the entire left side usable and clean, we should start with a vertical splitter.
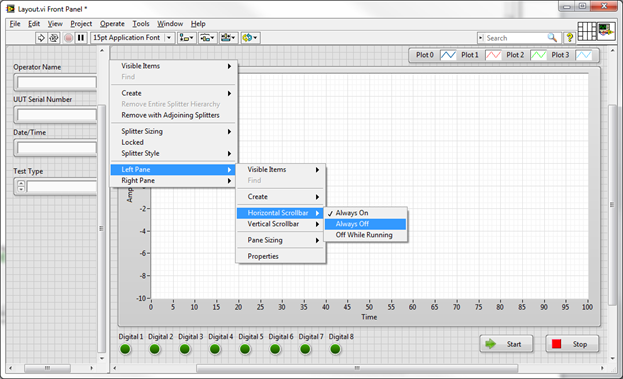
Drag a splitter onto the front panel and section off the left text boxes from the graph as shown below. At this point, it’s going to look a little sloppy with scroll bars everywhere. Simply right click on the splitter bar, drill down to the pane you are concerned with and turn off each scrollbar to clean things up.
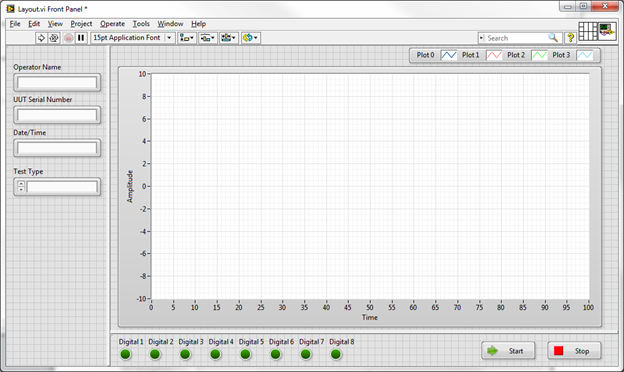
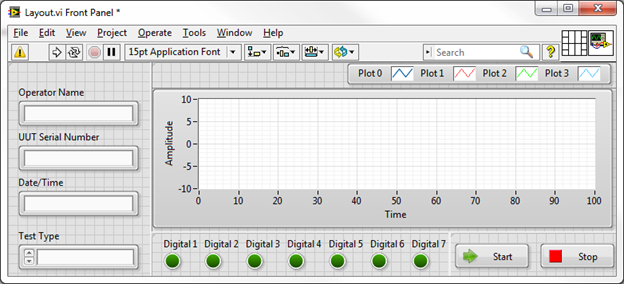
Repeat the same process for a horizontal splitter to section off the bottom digital inputs and buttons. Your screen should look as shown below when you are done:
Looks better now, but the splitters are a bit thick by default. It’s a little tricky to do, but you can shrink down the splitters to be about 1 pixel wide and almost invisible by grabbing the resize terminals in the middle of the splitter when you hover the mouse over it.
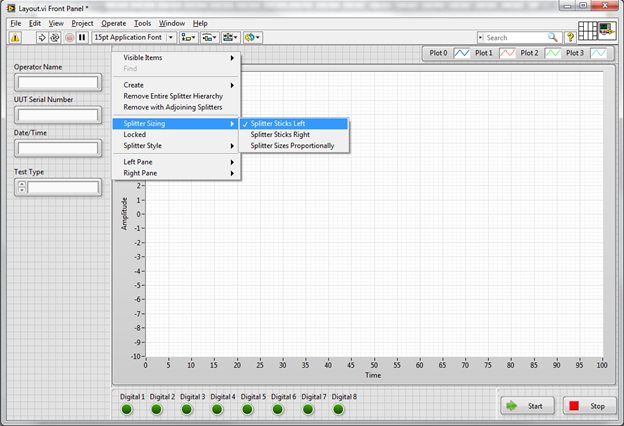
The next step that was not obvious before is relating to the buttons. We really would like the buttons to stay on the right side of the screen as it resizes, and keep the digital indicators on the left side of the screen in line with the graph. That will keep things looking clean as it resizes. How can we accomplish this? Add another splitter. Drop a vertical splitter just to the left of the buttons.
Next we need to define which way each pane sticks, grows, and shrinks. This is all configurable from the right click menus on each splitter. By default, each pane will stick to the top left corner and will not resize when dragged. These default settings are good for our left pane, and our digital indicator pane. For the buttons, we want slightly different behaviour to keep the buttons on the right side of the screen.
Configure all the splitters as listed below:
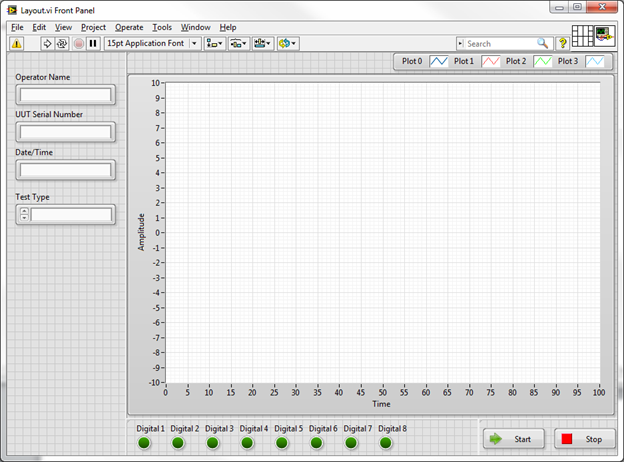
If you resize the screen now you’ll see the desired behaviour. There is one last step, which allows the graph to resize. In order to do this, simply right click on the graph and select “Fit Control to Pane”.
That’s it. Now resize the screen all you want, it will always lay out nicely. To add more controls and indicators with their own behaviour, just keep adding splitters as necessary.
Your screen should now look like this:
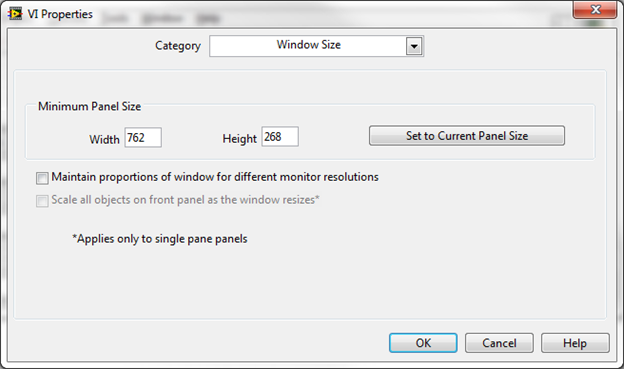
Once you have set up your UI, it’s generally a good idea to compress it down until it’s as small as possible while still being usable and set a minimum screen size. This will ensure users don’t make the window smaller than you ever intended (which can introduce some odd bugs in the LabVIEW layout).
Accomplish this with the following steps:
This was a simple demonstration for creating a simple, professional looking and scalable user interface. These concepts can be extended into much more complex interfaces involving tab controls, subpanels, XControls, etc. These more advanced topics are covered in my next blog: Advanced Resizable UIs: Multicolumn Listboxes.
Graham Beauregard

You must be a registered user to add a comment. If you've already registered, sign in. Otherwise, register and sign in.
