From 04:00 PM CDT – 08:00 PM CDT (09:00 PM UTC – 01:00 AM UTC) Tuesday, April 16, ni.com will undergo system upgrades that may result in temporary service interruption.
We appreciate your patience as we improve our online experience.
This article is continues the discussion about making re-sizable screens in LabVIEW. Part 1 here. Check out the links and videos courtesy of Sam Sharp and Jeff Habets.
While on the subject of links check out this description of the LabVIEW dimensional model. Extremely useful!
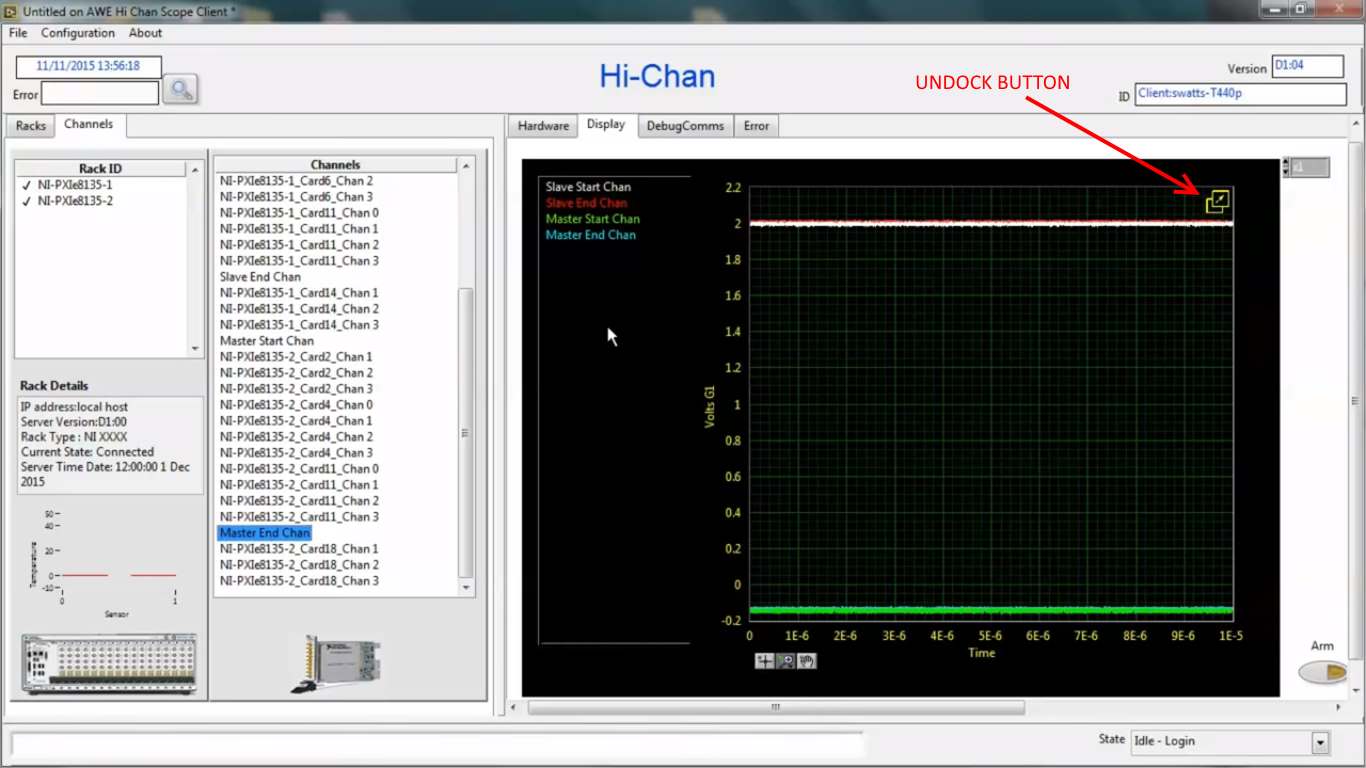
We left our screen with a nice little undock button and the code to instantiate a graphscreen vi.
This article will concentrate in this graph screen display. If you skip to 6 minutes into the following video I demonstrate what I am aiming for.
Graph
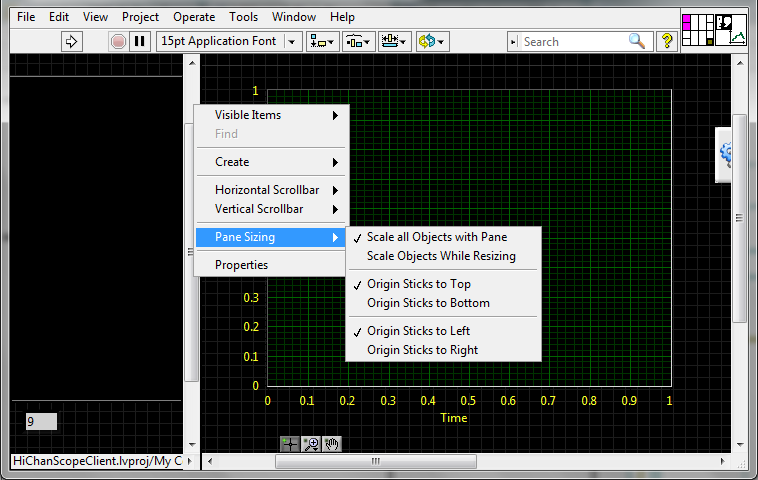
The behavior I'm expecting here it for the graph to fill the available space without encroaching on any other objects on the screen. The only issues I've found are the palettes, titles etc seem to have a bit of a life of their own so give them a bit of space.
List Box for Channels
The behavior we expect from a list box is that it keeps it's width but extends in height, this can be achieved by adding a splitter and locking it.
As Sam Sharp says splitters are cool!
Measurements and Cursors
I wanted the measurements and cursors to be off-screen unless required. They also needed to stay the same size in a repeatable position. To become visible when selected. To achieve this we have a button that keeps to the edge of the screen and when selected comes onto the screen allowing interaction with the tabs.
This little tip was from Tim Hursts presentation at the CLD summit with a couple of modifications by me.
We don't want this part of the display to re-size, so I made the tab a strict type-def. when not required I push it to the side.
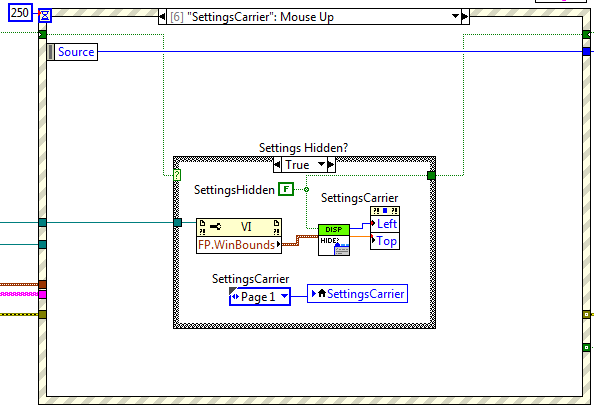
I've called the tab control settingsCarrier and the code to bring it in is as follows
The subvi just sets the position left or right depending on the SettingsHidden boolean (I have a separate button to push it back out of sight) and this vi is also used on a return button or resize event.
The only issue left was that if you had the tab visible it looked really ugly when you resized the panel, so my trick is to have a tab within a tab and make the carrier tab transparent, I could then flip it to a transparent window when it is hidden.
I've been a bit sneaky by embedding a graphic of a tab in the tab selector (it would be transparent too otherwise).
The only other tips I would give is to follow a rule of the simplest way to handle these screens is to remove as much functionality into menus and windows title bars as possible, so then you don't have to worry about them.
I hope this has been useful and if you have any questions post them in the comments (or pm me)
LabVIEW can be quite cumbersome when dealing with screen sizes, our stock way of dealing with this is to restrict the screen size of our applications. This hasn't been too much of an issue until now. My current project needs to be able to run on different resolutions and it also needs to undock graphs, these also need to be resizeable. I thought it may be useful to list out the techniques and challenges.
First lets think about what we want to happen when a screen size is changed.
We want some controls to change in proportion to the screen size, graphs for example.
We want some controls to stay the same size but be anchored to a position on the screen, buttons and drop down controls.
We want some controls to stay in proportion to one axis, so a list box to adjust vertically, a status string to adjust horizontally.
Some controls can be removed (tip: the easiest to manage control is one you don't need to manage!).
Some controls can be restricted.
First let's deal with undocking.....
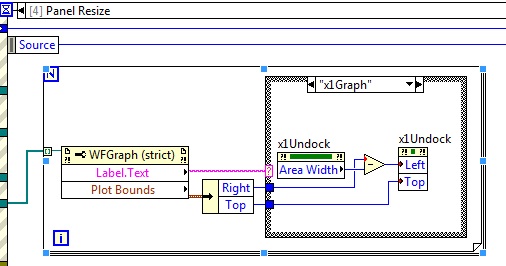
The first challenge here is to make a button that keeps its proportions, and is locked to a position on the graph. I want it to always be in the top right hand corner of the graph. Aesthetically I want it to be unobtrusive (i.e. use transparency to make sure it doesn't get in the way of the graph). I made a line drawing in LibreOffice Present and cut and paste this into a vertical button (from the UI Control Suite:System Controls Palette). The easiest way to restrict its size is to set it as a Strict Type Def. Finally we need to lock it into the top-right hand corner of the graph, sadly the only way to do this is writing code!
x1Undock is the button, so we take the width and move it relative to the Right of the Plot Bounds of the graph.
This is code worth noting as you'll be using it a fair bit, due to the fact that LabVIEW is natively a little random when left to its own devices!
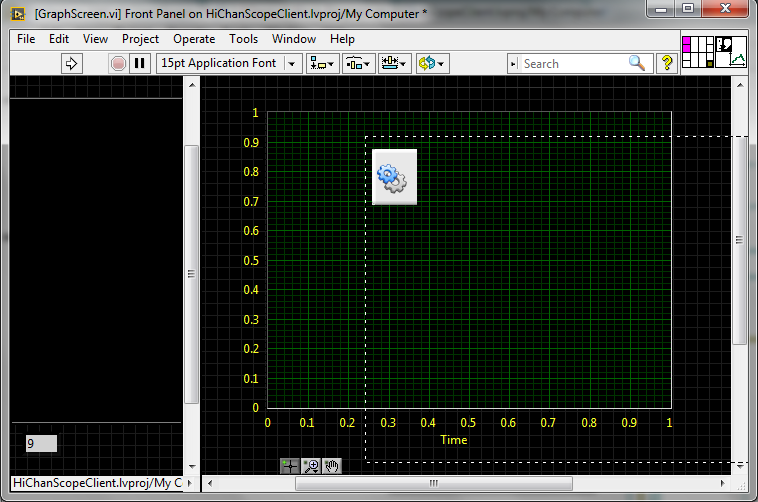
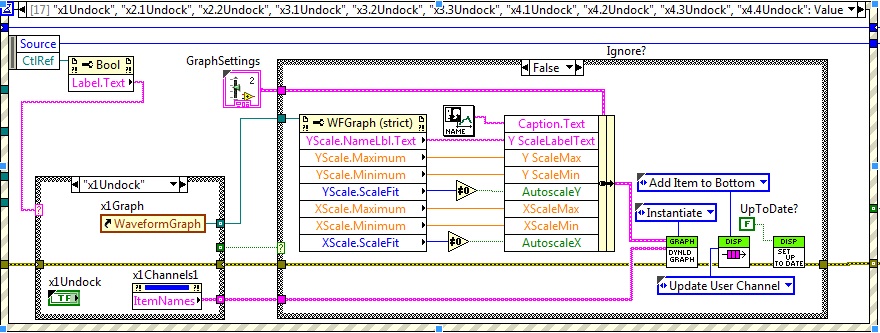
Pressing this button will instantiate a graphscreen.vi instance, pre-loaded with the settings from the docked graph.
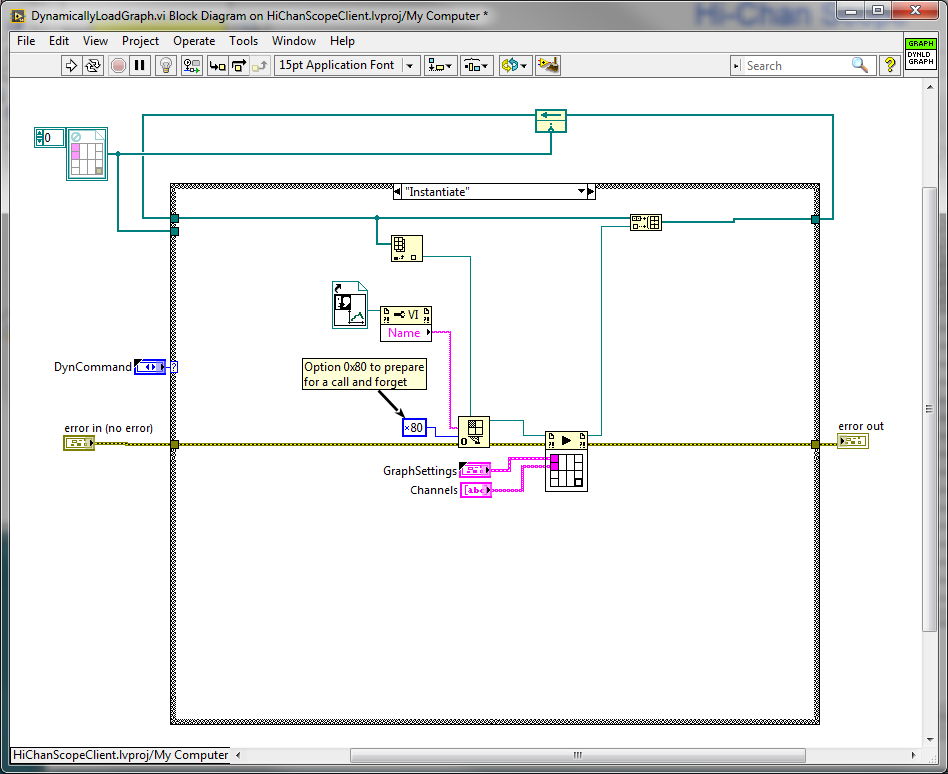
The code to instantiate the graph is as follows
Keeping control of all the dynamic references in this manner has worked out nice, it allows us easy housekeeping and access to control and indicator values.
As a multi-media project I've been recording myself designing a screen with a view of condensing the entire process into one small, sped-up video.
I was so pleased with the results I'm going to post it incomplete because it made me happy!.
Right back to work for me
I suppose I should give some details of the job.......
The idea here is that my esteemed colleague Adrian (Tark on here) is doing all the hard stuff to do with deciphering comms, designing servers and depositing data. In MVC terms he is handling the Model and the Controller. As is our norm we have decoupled the screen (essentially a seperate loop with a queue component) and he has sub-contracted that aspect to me (I like UI stuff). To keep it simple I don't have access to the code repository, I just give him my updates to incorporate.
So while not a complete MVC we can see the advantages of splitting off the UI.
For validation reasons we are attempting to keep the screens similar to those that are currently part of the system.
Lots of Love
Steve
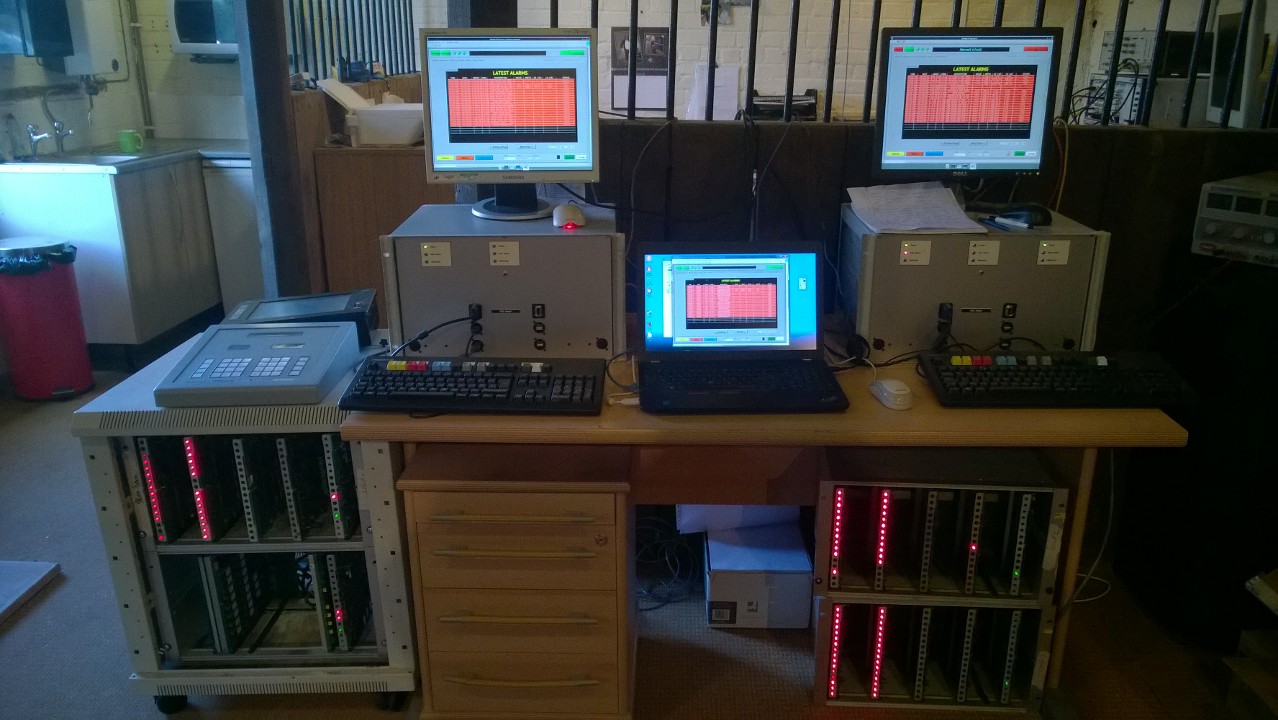
Update 09-Feb-2016: Here's a picture of the system, just after it's Lloyds Register factory test was completed.