- Document History
- Subscribe to RSS Feed
- Mark as New
- Mark as Read
- Bookmark
- Subscribe
- Printer Friendly Page
- Report to a Moderator
- Subscribe to RSS Feed
- Mark as New
- Mark as Read
- Bookmark
- Subscribe
- Printer Friendly Page
- Report to a Moderator
Contact Information
University: New Mexico Institute of Mining and Technology
Team Member(s): Aaron Bentley, Byron Marohn, James Mason, Beryl Wootton
NI POC: David Bonal
Faculty Advisors: Dr. Hector Erives
Email Address: AunorSjet@gmail.com
Country: United States of America
Project Information
Title: NMT/EE Robotics Senior Design Project, USA
Description:
The capstone class of the Electrical Engineering department at NMT is the Senior Design Team Project. This year, our team, using NI components, designed, built, and tested a remote-controlled diagnostics robot for Los Alamos National Labs to monitor the linear particle accelerator at their Neutron Science Center.
Products:
NI LabVIEW 2011 with assorted toolboxes,
A 4-slot CompactRIO,
NI9234 Analog Input Module,
NI9221 Analog Input Module,
NI9403 Digital Output Module
The Challenge:
Because of the possibility of gamma radiation within the building that houses the linear particle accelerator at Los Alamos National Labs' Neutron Science Center, human scientists are not allowed to enter that beam tunnel. Though there are sensors already in place, these are at fixed points along the tunnel and cannot be moved while the accelerator is in operation. To address the sensory “blind spots” that have consequently formed, an Electrical Engineering Senior Design Team from the New Mexico Institute of Mining and Technology (NMT) made up of Aaron Bentley, Byron Marohn, James Mason, and Beryl Wootton built a remote-controlled diagnostics robot that will serve as researchers’ and engineers’ eyes and ears in the tunnel that houses the accelerator. Because each complex subsystem could itself be its own design project had the team chosen to build it from scratch, the design process instead consisted of selecting components that met the clients' requirements and focusing effort on integrating all the sensors and peripherals around National Instruments' CompactRIO. The final product features color and thermal visual input from the beam tunnel, directional sound, and radiation detection, and is controlled using a complex control program built on National Instruments' LabVIEW.
The Solution:
The finalized robot features a sturdy chassis with tank-style treads that allow the robot to drive over small obstacles and a pan/tilt turret head upon which the sensor palette is mounted. The robot is powered by two 24V NiMH batteries and a four-layer power distribution printed circuit board. This board converts the 24V into stable voltages for all the subsystems on the robot and has a series of fuses (for safety purposes) and relays (to deactivate unused systems, thus saving power). The board also contains digital communication lines that connect the NI9403 Module on the CompactRIO to the digital input/output systems of all the sensors. This allowed the team to group the power and communications lines together in one, convenient connection. The chosen chassis has built-in, high-torque motors that are controlled by a motor driver; this motor driver uses packetized serial communication to receive commands to driver forward, backward, and turn in place, clockwise or counter-clockwise. The CompactRIO controller receives commands by network stream over wireless local area network. To accomplish this, the cRIO, along with the two cameras in the design, are connected to a network switch, which is connected to a network bridge. This bridge connects the robot to the network and makes the various network components look like one device. To warn bystanders the robot is in operation, the team has included light emitting diode strips that flash when the motors are given a command to move. These strips are mounted on the lid of the chassis, around the pan/tilt turret head. Mounted on the pan/tilt sensor platform are two cameras: a color camera and a thermal camera. These share a similar field of view, which allow the robot operator to have a side-by-side comparison of the same area. Mounted above the cameras are two light emitting diode arrays that serve as spotlights. The brightness is controlled by the cRIO controller via pulse-width modulation. Behind the spotlights are the radiation detectors and control board. This control board has a counter embedded on a field programmable gate array (FPGA) device that counts every time a high-energy Muon particle passes through the detectors. There are two microphones, one on either side of the radiation subsystem and spotlights. These connect to a C-Series Module directly and send stereo sound back to the operator. There is a complex software layout that mirrors the hardware and utilizes the CompactRIO's built-in field programmable gate array device to do the bulk of the processing. Each peripheral connects either directly to a C-Series Module or indirectly to the 9403 module through traces in the power distribution printed circuit board. The team used LabVIEW's Real Time development suite and used the Real Time aspect of the CompactRIO both to pass the data between the FPGA and the network bridge and to translate high-level commands into arrays of bytes for the FPGA to send to subsystems. The controller drives, moves, and receives feedback from the robot on a host computer running Microsoft Windows. Using the built-in Virtual Instruments (VI's) in LabVIEW, the team implemented a joystick to issue movement commands. Voltage indicators, battery charge indicators, radiation counts, and the color camera view are all displayed on the Front Panel of the program and can be easily reconfigured based on the operator's preference.
In the past, the team has had a good deal of experience in conventional, line-by-line programming in languages such as C, C++, and MATLAB. With this understanding of programming and with some help from workshops and the team's National Instruments representative, the team was able to quickly pick up and use G in the project. One of the greatest things about LabVIEW is the sheer number of examples, both built into the software library and online. Each module we decided to use had numerous examples with applications similar to ours that allowed us to quickly learn how various VI's could be used. For example, with the NI9234 and the team's microphones, there were many pre-built VI's that showed how sound acquisition could be accomplished. One of the requirements of the project was to provide the customer with a robust, easy-to-use graphical user interface (GUI). This was a simple task for the team to accomplish, as LabVIEW, with its intrinsic Block Diagram/Front Panel nature, has a GUI built into each Virtual Instrument. The Network Stream capability made lossless data passing really simple and straightforward. What made LabVIEW most useful to the team in this project, however, is the amount of abstraction in the data acquisition process, which allowed for rapid program development. Rather than having to deal with individual registers or systems like you would with a traditional microcontroller, you simply drag and drop VI's that perform low-level tasks for you. Another great aspect of using National Instruments technology in this project was the plug-and-play capability of the controller. With the myriad C-Series Modules built for a near infinite number of uses, the team was able to find precisely what they needed to interact with all their peripherals. And with the option of multiple sizes of FPGA backplanes, the team was able to save internal space in the robot by using a four-slot cRIO rather than an eight-slot.
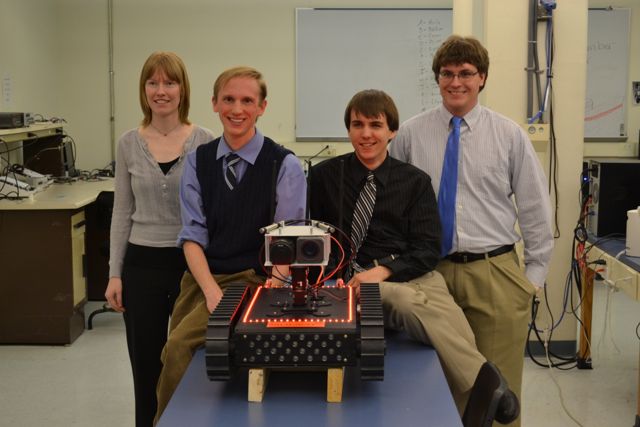
<Posing with the robot, from left to right: Beryl Wootton, Aaron Bentley, Byron Marohn, James Mason>
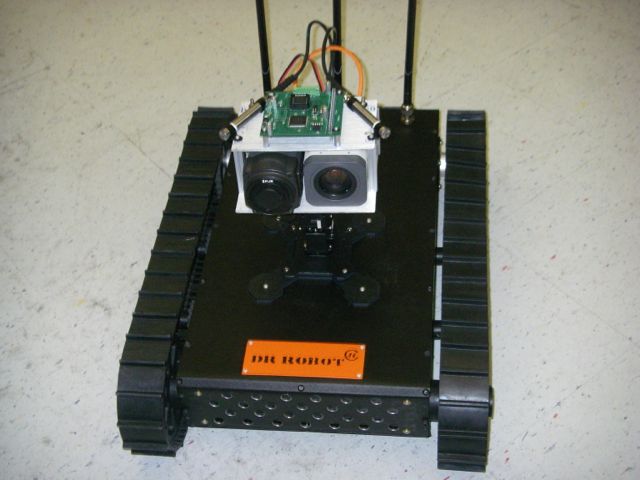
<The completed robot, special emphasis on the chassis, dual cameras, microphones, and Muon detector>
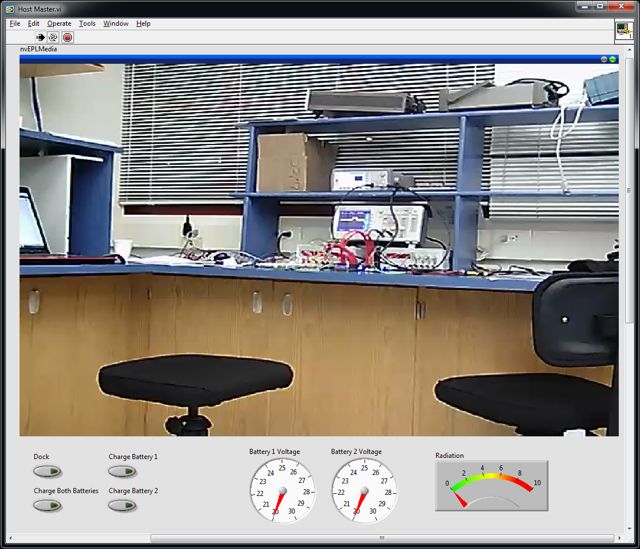
<Sample Graphical User Interface: The Front Panel of the Host, showing indicators and Color Camera View>
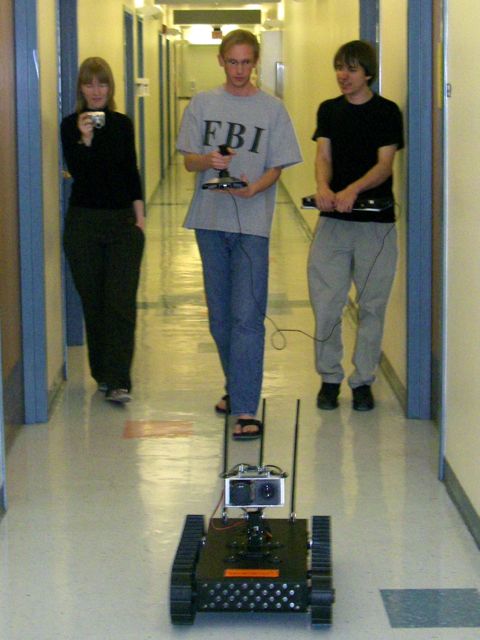
<Testing the robot in the Electrical Engineering department at NMT>

<Data Flow Diagram detailing interaction of Host computer, camera, and CompactRIO>

<Diagram showing how hardware is connected in and around the CompactRIO Controller>
