- Document History
- Subscribe to RSS Feed
- Mark as New
- Mark as Read
- Bookmark
- Subscribe
- Printer Friendly Page
- Report to a Moderator
- Subscribe to RSS Feed
- Mark as New
- Mark as Read
- Bookmark
- Subscribe
- Printer Friendly Page
- Report to a Moderator
Purpose:
This document gives a generic background of proximity sensors, and explains how to use an IR proximity sensor with the NI myDAQ or ELVIS II series.
Background:
There are many different types of proximity sensors, such as ultrasonic, capacative, inductive, magnetic, and infrared (IR). IR proximity sensors use reflected infrared radiation to determine distances. Certain information is good to know about our specific sensor—most of which can be found on the datasheet in the Prerequisite Reference Material section. Take a look at Figure 1 below:
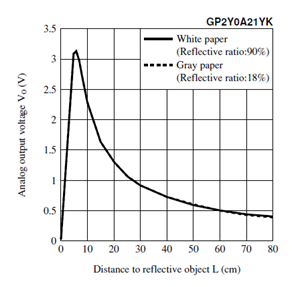
Figure 1: Proximity sensor response curve
The range of sensing is about 0-80 cm, although most of the useful linear information is found in the range of about 5-30 cm. For this reason, and simply to make our application more user-friendly, the LabVIEW VI that will be shown later in the discussion excludes large distance signals.
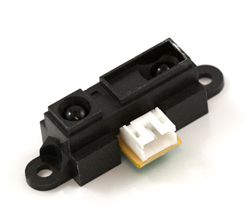
Figure 2: IR proximity sensor used in this exercise
Equipment:
- NI myDAQ or ELVIS II series
- NI LabVIEW
- Sharp GP2Y0A21YKOF Sensor: www.sparkfun.com
- Recommended: 3-pin JST and JST connector (found at bottom of sensor’s webpage)
Prerequisite Reference Materials:
IR Proximity sensor specifications:
http://www.sparkfun.com/datasheets/Components/GP2Y0A21YK.pdf
Download LabVIEW:
Set Up Hardware:
The IR proximity sensor is connected to the myDAQ or ELVIS II through four ports--AI0+, AI0-, the +5V power supply, and ground (can be analog or digital). Wire the sensor to match the figure shown below. The wiring is identical for the myDAQ and ELVIS II.
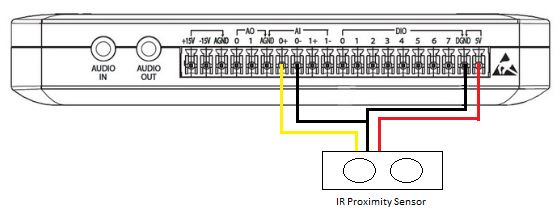
Figure 3: Proximity sensor connection to the NI myDAQ
The wires marked red, black and yellow are the sensor’s power, ground and signal wires, respectively. These wires may need to be wrapped around more sturdy wires in order for them to connect with the breadboard or screw terminals. AI 1+/- will be used to read the voltage from the sensor that indicates its proximity to an object. Place the IR sensor facing up on the surface you are working on, or tape/screw it to a perpendicular board/wall of some kind.
Software Instructions:
Open 'proximity sensor.vi'. This VI simply reads in the voltage from the proximity sensor and displays it on a waveform chart. Once the hardware is all set up and your myDAQ or ELVIS II is plugged into your computer, run the program. Move your hand towards and away from the sensor, watching the voltage rise and drop. Note that just as Figure 1 shows, the voltage increases as your hand moves closer to the sensor until it reaches a certain threshold distance, and then drops.
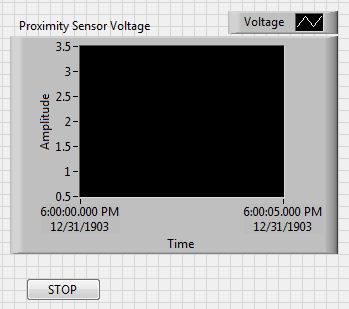
Figure 4: Front panel of 'proximity sensor.vi'
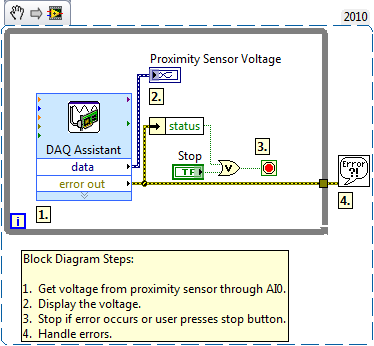
Figure 5: Block diagram of 'proximity sensor.vi'
Applications Engineering
National Instruments
